First, there was Tartine bread. Then, there was Tartine Bread.
fig. a: Tartine Bread
It had only been about eighteen hours since we'd touched down at SFO for our two-week Northern California vacation, but there we were, already back at
Tartine Bakery. As you may
remember, we'd spent a fair bit of time at Tartine Bakery on a previous tour of Northern California back in 2005. Breakfast, lunch, late-afternoon snacks, dessert, bread, coffee, wine, tea--we'd pretty much tried it all. In fact, we'd left the Bay Area so thoroughly acquainted with the whole Tartine experience, that as we made our way to 18th & Guerrero, it felt like we were going to visit an old friend.
Of course, the Tartine family had grown since the summer of 2005. Chad Robertson and Elisabeth Prueitt, Tartine's founders, opened
Bar Tartine just a few blocks away from Tartine Bakery not long after our last visit. And we'd heard so many great reports about this latest venture over the years that it was right at the top of our "to do" list. But just as importantly, we wanted to make sure that Tartine Bakery--our original love--was more or less as we'd left it. We wanted to make sure that
some things in life stay the same. Or, at least that some things can be depended on. And as much as we couldn't wait to try their croissants, their morning buns, and their cookies again, what we were most excited about was Tartine's bread--their country and their walnut loaves. Which is why we actually visited Tartine Bakery twice on Day 1 of our trip--once to take a look around and have some sweets, and a second time to pick up a loaf of their country bread. Those fabled Tartine loaves are only available
once a day--at around 5:00 p.m.--you either have to be very prompt, or you have to order your loaf ahead of time. We opted for the former strategy--we came back at 5:00 on the dot.
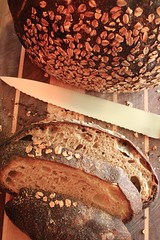
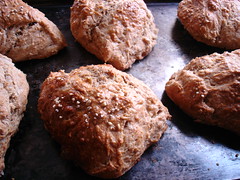
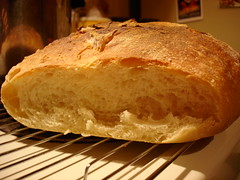
Now, like so many of the best things in life, Tartine's bread doesn't come cheap ($7), but it all makes sense as soon as you're cradling one of their loaves in your arms. Tartine's country bread is one hefty loaf of bread (two pounds?). More importantly, it's a sight to behold, a veritable work of art.
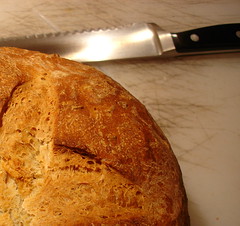
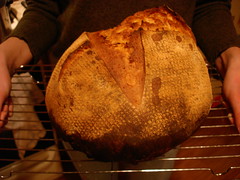
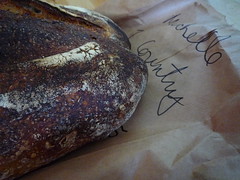 fig. b: Michelle country
As you can see, it's perfectly baked, with a deep, dark amber color and a pronounced crust.
What you can't see is a) how good it smelled as we carried it away from the store, still warm from the oven, and b) how ridiculously good it tasted when we got it home and sliced it open. The crumb is mild, moist, and incredibly open-structured; the crust is hearty, caramelized, and bursting with flavor.
Put simply, Tartine's country bread was phenomenal. We had it with cheese, with soups, with sauces. We had it plain and toasted, and we used it to make sandwiches. We had it for breakfast, lunch, and dinner. It was huge, so it lasted for days. And because it was a true sourdough, it barely staled. I would have happily paid good money for that loaf on Day 3, let alone Day 1. But we didn't have to. We were right there, so we went back again and again.
In case you're not getting the message, we couldn't get enough of Tartine's bread during our stay. We knew Chad Robertson had a bread book slated for release in the fall even before we left for California, and we were already pretty excited, but after eating Tartine's truly memorable sourdough loaves for two weeks, we were gripped with anticipation. We were also gripped with the DTs. Montreal's bread situation has gotten more and more dire over the years--when we got back home, our store-bought loaves paled in comparison. Literally.
Our copy of
Tartine Bread finally showed up on our doorstep in early October (none too soon!), and we were immediately impressed. The book is amazingly thorough: it works through the basic method for the basic country loaf in extraordinary detail, provides a number of tantalizing variations on this basic method, then moves on to cover baguettes and enriched breads (including English muffins, brioches, beignets, and croissants), before closing with over 100 pages of recipes involving days-old** bread.
It's also richly illustrated. Robertson's principal collaborator on the project was Eric Wolfinger, a cook/baker/surfer/photographer, and together they'd wisely decided that a proper bread book should be heavily illustrated. How else to teach amateurs what, exactly, to be looking for? How else to teach them to pay attention to how bread behaves?
But just as importantly, the book was inspiring. Weaved into it was a life story, one that involved love, travel, apprenticeship, dedication, collaboration, and surfing (yes, surfing), one that was motivated by a fundamental faith in that fabled "daily bread"--what Robertson calls that "elemental bread that sustained generations."
I was totally taken by the whole thing. I read it through once. I read it through twice. And then I really dug in. And, just as Robertson promised, the results were magical.
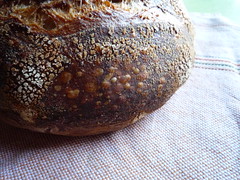 fig. c: country
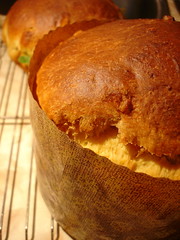
Right from the start, my loaves showed great oven spring, they had beautiful burnished crusts, and they were amazingly tasty, characterized by a surprisingly sweet (not sour and tangy), rounded wheat flavor. With a bit of practice, they started to look almost professional.
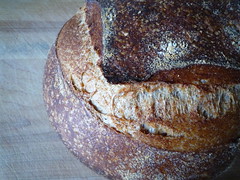 fig. d: whole-wheat
How was I getting such satisfying results so quickly? Well,
Tartine Bread isn't just a thorough book on baking bread--it's also been specially designed for the home baker, so that even novices can get professional results from a conventional oven. If you've tried Jim Lahey's now legendary
no-knead baking method, aspects of Robertson's approach should be very familiar.
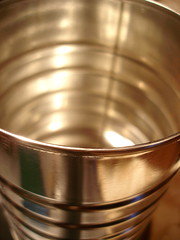
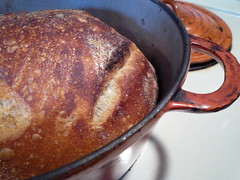 fig. e: dutch oven & co.
Like Lahey, Robertson employs the use of a Dutch oven in order to create the intensely hot and humid environment necessary to achieve a proper crust. Like Lahey, Robertson's dough is a much moister dough than you might be used to. It features an unusually high hydration level (75% in baker's percentages). This moistness is what makes Robertson's dough suitable for a no-knead method,* but it's also one of the reasons his recipe results in such a wonderfully tender crumb, not to mention a loaf with such staying power.
Tartine Bread was also rigorously tested for the home baker. Robertson assembled a team of test bakers to try out his Basic Country Bread recipe--the cornerstone of his method--then created a private blog so that notes could be circulated and data could be accumulated. The results were extraordinary: "Many testers made exceptional bread, judged by professional standards--it was virtually indistinguishable from our own Tartine bread..." When it came time to assemble his book, Robertson realized that this test process held important lessons, and that profiling a few of his test bakers might provide his readers with the added encouragement they might need to roll up their sleeves and start making real bread at home.
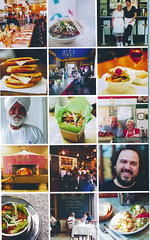
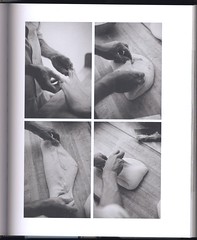 fig. f: Tartine bread pix
Finally,
Tartine Bread isn't just richly illustrated, it's exhaustively
photographed. Robertson worked closely with Eric Wolfinger on this book, and he took full advantage of his collaborator's skills as a photographer. There are a number of other excellent bread books out there that take pains to illustrate the processes of making bread in detail. Books like Jeffrey Hamelman's
Bread: A Baker's Book of Techniques and Recipes and Rose Levy Beranbaum's
The Bread Bible include some photographs, but rely mostly on line drawings. Jim Lahey's
My Bread: The Revolutionary No-Work, No-Knead Method uses a lot of photographs, and it recognizes photography's ability to document step-by-step instructions in a way that goes beyond what line drawings can accomplish, but its use of photographs is timid compared to
Tartine Bread.
While Lahey's photo-essay "The Basic No-Knead Bread Recipe in Pictures" is composed of 24 photographs, Robertson's instructions for his Basic Country Bread includes nearly 70 photographs, not including those that illustrate "Making a Starter." The difference here isn't only one of quantity. The seriality and precision of Wolfinger's photographs provide an invaluable reference when you're first getting used to the Tartine method. Together with the thoroughness of text (which is heavy on visual cues), they provide you with all the guidance you need to make successful loaves right from the start.
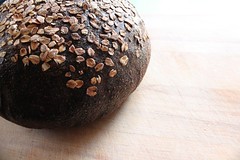
Results have been so good, and the experience of making real, honest-to-goodness sourdough at home has been so rewarding, that I've become a little obsessed. I haven't actually made that many of Robertson's bread recipes, to tell you the truth, but those I have made, I've made a lot of. So in addition to many, many loaves of the Basic Country Bread, I've made a bunch of walnut loaves, some polenta bread (with pumpkin seeds and rosemary!), some olive bread (with walnuts, lemon zest, and
herbes de Provence!), and a few pizzas. Yeah, that's right, pizzas.***
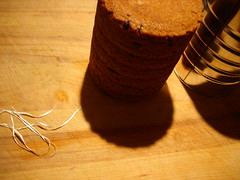
There have been other signs of obsession, as well. Not only did I go out and purchase a 20 kg bag of white flour, not only did I
photograph it (?),
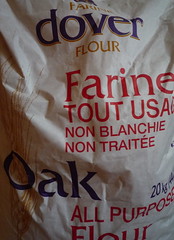 fig. g: 20 kg Oak
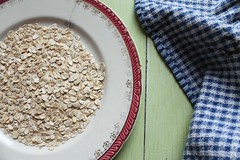
but I worked through that bag in about a month. I've also been taking bread photos--again, a lot of them. Whole loaves, like the photos above. Half loaves and cut loaves.
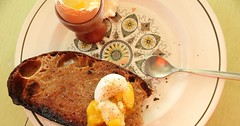
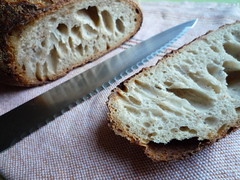 fig. h: still life 1
Slices.
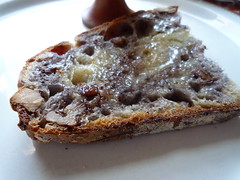 fig. i: still life 2
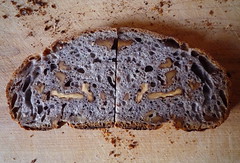 fig. j: rorschach test
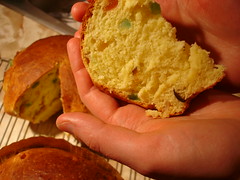
And a whole bunch of shots that highlight the bread's open structure.***
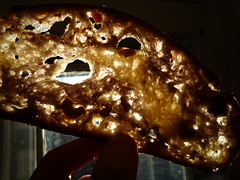
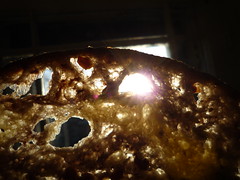 figs. k & l: open structure 1 & 2
No kidding. Baking sourdough does crazy things to you.
Just a few more notes:
Not only does Robertson insist that you don't need a professional bread baking oven to make professional quality bread, but he also insists that the flour you use isn't nearly as important as the process. This isn't to say that flour doesn't matter, or that all flours are created equal. Tests proved that the flour Robertson gets milled specially for Tartine resulted in the best loaves with the finest flavors. That said, combining conventional, supermarket-bought all-purpose flour with the Tartine method resulted in loaves that were professional quality and superior to the overwhelming majority of store-bought loaves. So there.
Robertson's method for making true sourdough bread is remarkably simple, but it still requires some investment. You're going to need some basic equipment, like a proper scale, a bench knife, a Dutch oven, etc., and you're going to need to be dedicated to reading through the process carefully, and being exact when it comes to following it. You also need to realize that while Robertson's method is somewhat less labor-intensive than other methods, it is time-intensive. The real secret to Robertson's bread has to do with letting the sourdough work its magic slowly and thoroughly. As Robertson puts it: "The baker's skill in managing fermentation, not the type of oven used, is what makes good bread. This fact makes
Tartine Bread possible." So it does take a fair bit of time to get from feeding your starter to taking your finished loaf out of the oven, but the nature of the Tartine method is such that it's feasible to work sourdough bread baking into a busy schedule (although wouldn't you rather take your time, do it right, and enjoy the process?), and the book provides helpful strategies for doing so.
And, lastly,
Tartine Bread isn't without its glitches (it is the first printing, after all)*****, but it's a remarkably rigorous book, and it's filled with pure inspiration from start to finish (from its Basic Country Bread, to its recipes for soups, salads, sandwiches, sides, and desserts), and I predict the book's impact on the state of baking in North America will be enormous. There was a reason
Tartine Bread topped our
list of cookbooks for 2010. There were a lot of great cookbooks that were released over the course of the year, but no other book held the potential to really shake things up that
Tartine Bread does.
Long live "elemental bread"!
Tartine Bakery & Cafe, 600 Guerrero St., San Francisco, CA, (415) 487-2600
aj
p.s. Still need more convincing? For
even more about Chad Robertson, Tartine Bakery, Tartine's Basic Country Bread, the test bakers, etc., check out Tartine's
bread video.
* Instead of conventional kneading, his method relies on gently folding the dough in a bucket, a modern take on the tradition of trough kneading.
** Again, Tartine's loaves are so well made that they stale very slowly. They literally aren't stale enough on Day 2 to use in a recipe that calls for "day-old bread," hence, "days-old."
*** Robertson throws down on the topic of pizza, addressing some of the orthodoxies that have accompanied the pizza revolution of the last decade, and, in many ways, I think his common-sense approach is right on the money. He writes, "Our current pizza revival, with all the attitude, manifestos, and "secrets" (the flour! the water! the oven!), is amusing. Just start with good bread dough and a very hot baking stone, and you will end up with a great pizza." He's right, too. Get a handle on his Basic Country Bread recipe, and making amazing pizza at home is a snap. Seriously.
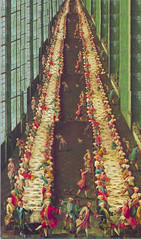
**** I, like so many others, was first inspired to find real French pain au levain after reading a profile of the late Lionel Poilâne in the pages of Smithsonian Magazine back in 1995 (you can find the abstract to the article
here). I say "find," because for some reason, it never really occurred to me that I could make it at home. At least, not with a proper crust. Anyway, that article was a revelation, and it set me on a path to locate such bread so that I could taste what Poilâne was describing, but, more than anything, what I remember about the article was a photograph of a slice of his bread being held up to the light to show off its open structure.
***** For instance, the Whole-wheat Bread recipe (which is in process as I write) lists 20 grams of salt, but is unclear on when to add it. Whereas the Basic Country Bread recipe adds the salt (and a bit more water) to the dough after an initial resting period, the Whole-wheat Bread recipe, which requires more water because whole-wheat flour has a higher absorbency than white flour, adds all the water at once, and never mentions when to add the salt. Like many of the other recipes in the book, the Whole-wheat Bread recipe is a variation on the Basic Country Bread, and after a few different steps early on, it advises readers to "[follow] steps 5 through 9" of the Basic Country Bread recipe. Unfortunately,
step 4 of the Basic Country Bread recipe is the one where the salt is added. Anyway, if you've worked through the Tartine method enough times, you figure it out.
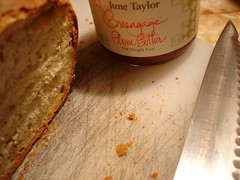
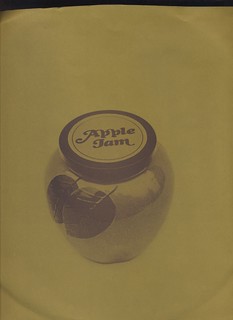 fig. a: George's Apple Jam
 fig. b: crabapples
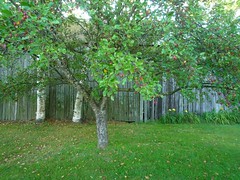 fig. c: crabapple tree
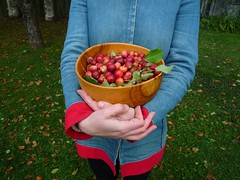 fig. d: freshly picked crabapples
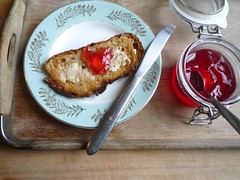
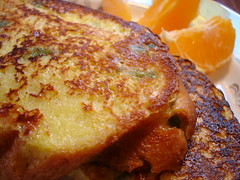
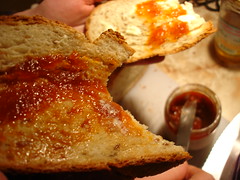
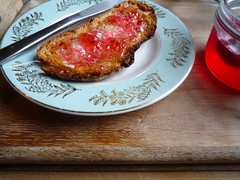 figs. e & f: crabapple jelly for breakfast
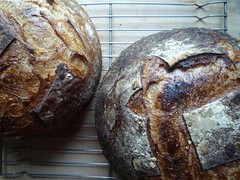 fig. g: pain de campagne


