Showing posts with label Tartine. Show all posts

Friday, June 06, 2014

DIY Pies

Summer isn't even here yet, but already the summer of 2014 is shaping up to be the Summer of the Pizza.  You see, a few weeks ago I experienced something of a pizza epiphany (the trigger appeared in The New York Times, so I'm pretty sure I wasn't alone), and since then I've been on a tear.

Tony's Pizza! 
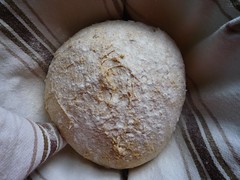
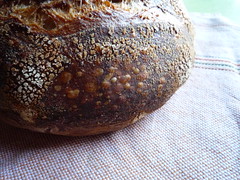
fig. a:  Tony's Pizza!

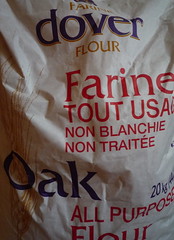
I'd been messing around with pizza recipes for a few years, and I'd experienced a fair degree of success, but I'd never quite hit on a recipe that felt like The One.  Most of the time I was working with variations on Chad Robertson's pizza basics from Tartine Bread.  I've been baking bread quite seriously for a few years now, and my method is very closely based on Robertson's method, so it made sense to follow his lead when it came to pizza, too.  If you follow the instructions in Tartine Bread, the pizza that results is a sourdough-based pie that's a bit on the rustic side for three reasons:  1) because you're essentially pinching dough from your country bread recipe, which contains 10% whole wheat flour, 90% all-purpose flour, and no 00 flour; 2) because your sourdough starter also contains whole wheat flour; and 3) because Robertson recommends dusting your pizza peel with corn meal to help with the transfer of the pizza to your stone. I like "rustic," and Robertson's method results in pizzas that have nice shape and great rise to them, but, still, even though I played around with the formula, it never felt like The One.

nyt margherita 
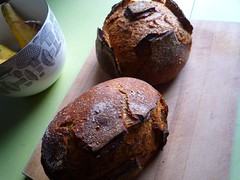
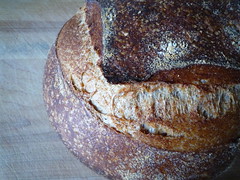
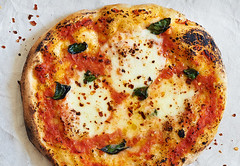
fig. b:  margherita by Falco & Sifton

Then I came across Sam Sifton's collaboration with Anthony Falco in the digital pages of The New York Times back in April.  Sifton wasn't just looking to create good pizza at home, he was aspiring to greatness.  And in order to crack the code, he turned to Falco, the "official pizza czar" at Roberta's, the pizzeria/restaurant/bar/tiki garden/community radio station that's perhaps the defining enterprise and hangout of the Bushwick scene of the last decade.  Roberta's also happens to produce some truly outstanding pizza pies.  What resulted was a manifesto.  After commenting on the sheer amount of pizza consumed in America, then lamenting the fact that so much of that pizza is so poor, Sifton goes ahead and proclaims the arrival of a New Era of DIY Pizza-Making:

Very little pizza is made at home, from scratch. 
I am here to change that.  I am here to say:  You can make pizza at home.  You can make pizza at home that will be the equal of some of the best pizzas available on the planet.  With a minimal amount of planning and practice, you can get good at it, even if you are a relatively novice cook.  [my emphasis]
That's a bold statement worthy of the bold type, but, the thing is, Sifton is just about right.  You can make pizza at home.  You can even make some mighty fine pizzas that are comparable to some of the best pizzas available on the planet.  The only thing you'll likely be missing out on is the effect of baking a pizza fast in a blistering-hot pizza oven that's running somewhere between 700º - 1000º F, especially a wood-fired pizza oven like Roberta's.  But your pizzas will look awesome and you'll be proud to serve them, and, even more importantly, you'll be blown away by just how great your DIY pies taste.  I mean, even your leftover pizza will look and taste great.

leftover pizza  
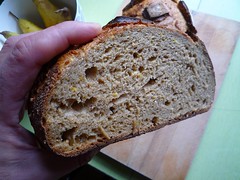
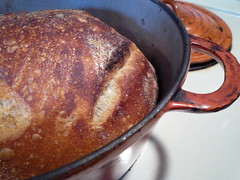
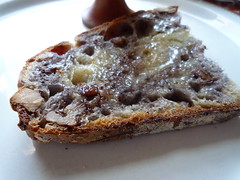
fig. c:  leftover margherita & sausage pizza lunch

As soon as I tried this Roberta's Pizza Dough recipe, it felt like The One.

The secret to the Roberta's recipe is all in the method.  Aside from the 00 flour, the ingredients are as basic as they get.  Sifton urges his readers to make use of a kitchen scale the way real bakers do.  I fully agree, but I've included the volume for the active dry yeast because the amount called for (2 grams) is very small, and my kitchen scale is not particularly trustworthy when it comes to such tiny amounts.  And although the recipe works with a minimum of 3 hours' rising time, it works like a charm and has a great deal more flavour if you start your dough about 24 hours before you plan to make your pizzas.  I've made a few 3-hour, 6-hour, and 8-hour pizzas using this recipe over the last couple of months, but I always get the very best results when I start 20 to 24 hours in advance.  Plan ahead.  What Sifton calls "a little pizza homework" really pays off.

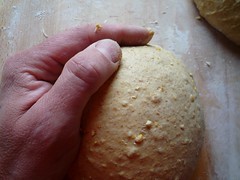
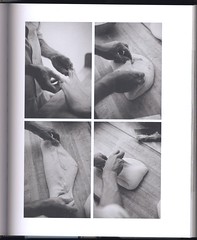
Another one of the reasons that Sifton and Falco's collaboration is such a success, is that the article comes with an accompanying video that's clear and concise and provides a great sense of what the dough should look and feel like at each stage in the process.  Don't miss out on it!

The only specialized pieces of equipment you need to make great pizzas at home are a pizza/baking stone and a pizza peel, but even these aren't 100% essential, and Sifton & Falco suggest some useful cheats.

Anyway, without any further ado:
Roberta's Pizza Dough 
Total time: 20 minutes, plus at least 3 hours of rising time 
Ingredients: 
153 grams 00 flour
153 grams all-purpose flour
8 grams fine sea salt
2 grams active dry yeast (3/4 teaspoon)
4 grams extra-virgin olive oil 
Preparation: 
1.  In a large mixing bowl, combine flours and salt. 
2.  In a small mixing bowl, stir together 200 grams lukewarm tap water, the yeast and the olive oil, then pour it into flour mixture. Knead with your hands until well combined, approximately 3 minutes, then let the mixture rest for 15 minutes. 
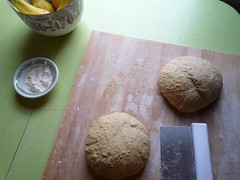
3.  Knead rested dough for 3 minutes. Cut into 2 equal pieces and shape each into a ball. Place on a heavily floured surface, cover with dampened cloth, and let rest and rise for 3 to 4 hours at room temperature or for 8 to 24 hours in the refrigerator. (If you refrigerate the dough, remove it 30 to 45 minutes before you begin to shape it for pizza.) 
4. Place your baking stone on the middle rack of your oven and preheat your oven at the very highest setting. 
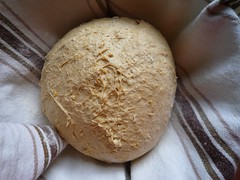
5.  To make pizza, place each dough ball on a heavily floured surface and use your fingers to stretch it, then your hands to shape it into rounds or squares. Top and bake. 
6.  Check your pizza after about 3-4 minutes.  Rotate your pizza if necessary.  Total baking time will be approximately 4 to 8 minutes, depending on the nature of your oven.   
Yield: 2 x 12-inch pizzas 
[recipe based very closely on the recipe that appears in "A Little Pizza Homework" by Sam Sifton, The New York Times, April 8, 2014]
When it comes to topping your DIY pies, Sifton is a proponent of simplicity:
Topping a pizza is tender work as well.  You do not want to overload the pie.  Doing so leaves it soggy, no matter the heat of the oven.  
He's absolutely right, and the recipes that accompany his article are all minimalist gems from the Roberta's repertoire:  their margherita; a two-cheese pizza that cleverly riffs on cacio e pepe, the classic Roman pasta dish (think lots of pepper); and the Green & White, which combines a simple mozzarella pizza with fresh greens.

But after you've mastered these, you'll likely feel emboldened and start thinking about experimenting with toppings a little.  This recipe is very amenable to such experimentation.  Just remember to keep it simple when you do.

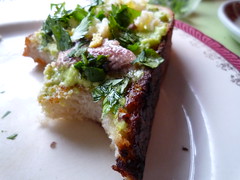
When I got started on this pizza craze back in April, I started out as simple as they get--mostly margheritas and marinaras.  But as soon as I felt I had the hang of this recipe (and that was pretty much immediately), I tried out some more adventurous combinations that I'd collected over the years--combinations that I'd either experienced firsthand, or that I'd read about.  Like this radicchio & gremolata pizza

radicchio pie 
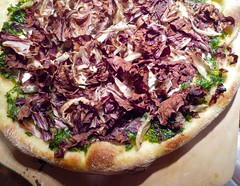
fig. d:  radicchio & gremolata pie

that I also read about in The New York Times a few years back.

Or this potato pizza recipe

Untitled fig. e:  potato pie

from Jim "No-knead/Sullivan Street Bakery" Lahey that's been blowing our minds for years.

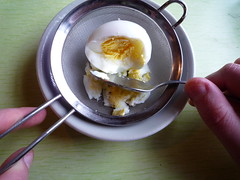
Or even this breakfast pizza

sausage & egg pizza 
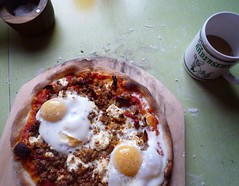
fig. f:  sausage & egg breakfast pie

that combined a riff on American Flatbread's classic New Vermont Sausage pizza with an homage to Motorino's breakfast/brunch pizzas.

Feeling lucky?  Here's the recipe for the radicchio pie:
Radicchio & Gremolata Pizza 
1/2 bunch parsley, roughly chopped
1 clove garlic, minced
zest of 2 lemons
zest of 1 orange
extra-virgin olive oil
salt & freshly ground black pepper
1 head radicchio, cored, outer leaves discarded, cut into 1/4-inch strips
4 oz mozzarella
1 oz grated Parmesan or aged pecorino 
Mix the parsley, garlic, citrus zests and enough olive oil to make a loose paste.  Add the salt and the black pepper until the flavour is strong and pleasant to the palate.  Let the gremolata sit for at least 30 minutes, or up to two hours. 
Once you've formed your pizza dough, spread half the gremolata on it, before topping it with half the mozzarella and half the Parmesan or pecorino, and, finally, half the radicchio.  This amount of radicchio might look excessive, but, don't worry, it will reduce significantly. 
Bake until the crust is golden and the radicchio is wilted and a bit charred. 
Eat and repeat. 
Yield:  makes enough topping for 2 x 12-inch pizzas.
[based on a recipe that accompanied "The Slow Route to Homemade Pizza" by Oliver Strand, The New York Times, May 18, 2010]
This beautiful pizza may very well have been the winner at a recent pizza party featuring four different types.  It looks amazing and the taste is unbelievable.  The radicchio gets a bit charred and crispy and caramelized on top; then there's a second layer of radicchio that gets sweet and juicy; and, finally,  there's the cheese and the gremolata to bring it all together and really make it sing.  We're talking a serious showstopper here.

Anyway, that Roberta's Pizza Dough recipe is the key.  Especially if you give it the time it needs to ferment properly.  I've never seen a pizza dough that's such a joy to work with.  And the flavour!

Stay tuned for more about potato pizza, and for my sourdough version of Roberta's Pizza Dough (!).

In the meantime:

Long live pizza!

&

Long live the New Era of DIY Pies!!

aj

Tuesday, November 26, 2013

Corn Rye

Corn and rye make for one of my all-time favourite combinations, but this recipe has nothing to do with corn mash or bourbon.  It's just a really nice recipe for a sourdough rye, featuring a couple of ingredients that are quintessentially American:  corn and molasses.

I got the idea after picking up some beautiful stoneground corn meal from Dexter's Grist Mill in Sandwich, MA back in August when we were visiting Cape Cod.

Dexter's corn meal fig. a:  corn meal

This corn meal was excellent, but it was also much coarser than I was used to, and a little too coarse to make my corn bread with.  (Read:  rustic!).  I had the idea of using it in a sourdough mixture so that the corn meal and its kernels would have the time to go through a slow fermentation process, retaining their size and their colour, but becoming more pleasantly edible.  I've always loved the combination of corn and rye, and bringing them together with molasses in a riff on my Danish sourdough rye made a lot of sense to me.

The results have been fantastic.  The kind of bread that you can't wait to turn into hot buttered toast in the morning.  The kind of bread that makes lunchtime a true joy.  The kind of bread that has you running home in the evening so that you can enjoy some more with your dinner.  That kind of bread.

My sourdough method is borrowed entirely from Chad Robertson's from Tartine Bread.  Moreover, my rye loaves--like my basic rye, my caraway rye, my Danish rye, and now this Corn Rye--are all based on Robertson's sourdough rye recipe from the very same book.  For optimum results, you should follow his directions closely.  Here, I'm just providing the measurements (in weight) and baker's percentages that you need to make two large loaves (roughly 2 pounds each).

Sourdough Corn Rye 
200 grams leaven (20%) 
600 grams warm water (80º F, ideally) + an additional 50 grams of warm water (65%)
100 grams fancy molasses (10%)  
[total hydration:  750 grams (75%), including the molasses] 
600 grams AP flour (60%) 
300 grams rye flour (30%) 
100 grams stoneground corn meal (preferably coarse) (10%) 
 [total flour:  1 kg (100%)]
20 grams of kosher salt (2%)
Photographic documentation:

Untitled  fig. b:  after first shaping

Here, the loaves have been given their initial shaping.  They've rested for 30 minutes.  They're just about to get their final shaping.

Untitled fig. c:  after second shaping

Here's loaf #1 after its final shaping.

Untitled fig. d:  before dusting

This loaf has received its final shaping and it's been placed in a rice flour-dusted towel in a bowl.  It's also upside down.  It will get dusted with more rice flour, it will get covered by the towel, and it will then go through its final fermentation process over the course of a few hours.

Untitled fig. e:  dusted!

Now the same loaf has been dusted, and it's waiting to get wrapped in the towel.

Untitled fig. f:  half loaf, full loaf

These are the two finished loaves.  One is already half-gone.

Untitled fig. g:  corn rye

Finally, this is an interior view of that half loaf.  You can see plenty of evidence of the coarse corn meal.  And it it looks moist, that's because it is.  In fact, it's a real keeper.  Still delicious days after baking (if you haven't eaten it by then).

This would  make a great loaf for a Thanksgiving feast.  It could also make for an excellent bread stuffing, so you might want to bake some extra and let it stale a little before the Big Day.  Just stick with those traditional, honest-to-goodness American flavours when you construct your stuffing.

Happy baking.  And happy Thanksgiving!

aj

Sunday, May 15, 2011

Got bread?, pt. 1

more bread fig. a: bread, bread

Good. Me too.

Of course, with bread this good, you barely need to do anything to it. But, then again, there's no need to be a puritanical about it. If you don't have access to "elemental bread" from a real, artisanal bakery (like Tartine, Red Hen, or Bohemian) you can bake your own, any time you like, no matter where you live.* So, go ahead, dress it up a little.

There are obviously plenty of different ways you could put those beautiful loaves to work, but Chad Robertson's Tartine Bread really is a great cookbook on top of being an exceptional baking book. It's chock full of all kinds of tempting recipes involving fresh and staled bread, including soups (white gazpacho, sopa de ajo, North African breakfast soup, etc.), salads (panzanellas, kale caesar, escalivada, etc.), sandwiches (pan bagnat, meatball sandwiches, bruschetta of all sorts, etc.), and a number of other mains and sides (tomates provençales, porchetta, savory bread pudding, etc.).

One that's become an instant favorite here at AEB, and that happens to be particularly seasonal at the moment, is Robertson's fresh chickpea hummus, which he serves as an open-faced sandwich on fried bread with olive oil-packed sardines, hard-boiled egg, and cilantro (!). Sounds inviting, right? It is. And his fresh chickpea hummus is unlike any hummus we've ever had before--lighter and more herbal (vernal, even), with a real chlorophyll punch.

Where to begin? Well, first you're going to need two pounds of fresh chickpeas. Dried and canned chickpeas are pretty much ubiquitous at this point in time, but fresh chickpeas aren't. So you'll probably have to hit up one of your better Mediterranean/Middle Eastern greengrocers. We got ours at Chez Nino, at Jean-Talon Market, and they looked something like this.

fresh garbanzos1 fig. b: fresh chickpeas by the bag

Then you're going to have to shell them. This takes a while, because there's no way to cheat and do them en masse--you've got to do them one by one, with your fingers. They're not nearly as finicky as fava beans, though, so don't worry. Just put on a record, pour yourself a drink, relax, and start peeling. Get a friend to help you, and it'll go twice as fast.

Once you get into it, it's actually kind of fun. There's something of the pleasure of popping bubble wrap to them, but this is endlessly more rewarding. Trust me. Instead of being left with plastic and air, you're left with something that's pretty and edible. The best are those nice full ones. They tend to be easier to shell, but they're also ripe and obviously full of flavor (try a raw one, if you don't believe me), and they also do a better job of filling your bowl. The very best are the twins, which are as cute as... well... two peas in a pod.**

fresh garbanzos3 fig. c: little twin peas

When you're done, you'll have a pile of freshly shelled fresh chickpeas that looks something like this.

fresh garbanzos2 fig. d: fresh chickpeas, shelled

And once you have those, and you've assembled all the other ingredients, you can really get started.

Open-Faced Sandwiches with Fresh Chickpea Hummus and Sardines, a.k.a. The Hummus Sardwich

For the hummus:

2 pounds fresh chickpeas (a.k.a. garbanzo beans), shelled
3 cloves garlic
3 tbsp sesame tahini
12 fresh mint leaves
juice of 1 lemon
1/2 tsp salt
1 cup extra-virgin olive oil

For the sandwiches:

olive oil
2 slices fresh or day-old bread (Robertson recommends his Whole-Wheat Bread, but we've found that his Country Bread is our favorite)
1 hard-boiled egg
one 3.75-oz can olive oil-packed sardines
1/2 cup chopped fresh cilantro

To make the hummus, bring a pot of water to a boil. Fill a bowl with ice water and place it nearby. Add the chickpeas and garlic to the boiling water and cook for 2 minutes. Drain and transfer to the ice water to cool them, then drain again.

Put the chickpeas, garlic, tahini, mint, lemon juice, and salt in a food processor. Process until smooth. With the motor on, add the olive oil in a steady stream until the hummus has the consistency you like. Adjust the seasoning.

Pour 1/4 inch of olive oil into a skillet and heat over medium-high heat. Add the bread and fry until deep golden brown and very crisp, about 3 minutes. Turn and fry until deep golden brown and crisp on the second side too.

Press the hard-boiled egg through a sieve like this.

boiled egg fig. e: boiled egg, sieve

Spread the hummus on the fried bread and top with sardines. Garnish with the sieved egg and chopped cilantro and serve.

hummus sardwich fig. f: hummus sardwich

Enjoy. Heartily.

Serves two, with plenty of leftover hummus to be used as you see fit.

[based very closely on a recipe entitled "Sardines and Fresh Garbanzo Hummus" in Chad Robertson's Tartine Bread]

If you're not big on the idea of sardines, just leave them out and make the fresh chickpea hummus. It really is something else. Serve it on its own, as you would a traditional hummus. Or make a sandwich with grilled vegetables, like artichoke hearts, red peppers, or asparagus.

Just make sure to make it sometime soon. Spring is slipping away, and so is the season for fresh chickpeas.

aj

* Well, maybe not exactly "any time you like" and "no matter where you live," but nearly.

** Not unlike these guys:

two peas in a pod fig. g: two peas in a pod

Saturday, January 08, 2011

In a Golden State 3: Tartine Bread

First, there was Tartine bread. Then, there was Tartine Bread.

fig. a: Tartine Bread

It had only been about eighteen hours since we'd touched down at SFO for our two-week Northern California vacation, but there we were, already back at Tartine Bakery. As you may remember, we'd spent a fair bit of time at Tartine Bakery on a previous tour of Northern California back in 2005. Breakfast, lunch, late-afternoon snacks, dessert, bread, coffee, wine, tea--we'd pretty much tried it all. In fact, we'd left the Bay Area so thoroughly acquainted with the whole Tartine experience, that as we made our way to 18th & Guerrero, it felt like we were going to visit an old friend.

Of course, the Tartine family had grown since the summer of 2005. Chad Robertson and Elisabeth Prueitt, Tartine's founders, opened Bar Tartine just a few blocks away from Tartine Bakery not long after our last visit. And we'd heard so many great reports about this latest venture over the years that it was right at the top of our "to do" list. But just as importantly, we wanted to make sure that Tartine Bakery--our original love--was more or less as we'd left it. We wanted to make sure that some things in life stay the same. Or, at least that some things can be depended on.  And as much as we couldn't wait to try their croissants, their morning buns, and their cookies again, what we were most excited about was Tartine's bread--their country and their walnut loaves. Which is why we actually visited Tartine Bakery twice on Day 1 of our trip--once to take a look around and have some sweets, and a second time to pick up a loaf of their country bread. Those fabled Tartine loaves are only available once a day--at around 5:00 p.m.--you either have to be very prompt, or you have to order your loaf ahead of time. We opted for the former strategy--we came back at 5:00 on the dot.

Now, like so many of the best things in life, Tartine's bread doesn't come cheap ($7), but it all makes sense as soon as you're cradling one of their loaves in your arms.  Tartine's country bread is one hefty loaf of bread (two pounds?). More importantly, it's a sight to behold, a veritable work of art.

michelle country fig. b: Michelle country

As you can see, it's perfectly baked, with a deep, dark amber color and a pronounced crust.

What you can't see is a) how good it smelled as we carried it away from the store, still warm from the oven, and b) how ridiculously good it tasted when we got it home and sliced it open. The crumb is mild, moist, and incredibly open-structured; the crust is hearty, caramelized, and bursting with flavor.

Put simply, Tartine's country bread was phenomenal. We had it with cheese, with soups, with sauces. We had it plain and toasted, and we used it to make sandwiches.  We had it for breakfast, lunch, and dinner. It was huge, so it lasted for days. And because it was a true sourdough, it barely staled. I would have happily paid good money for that loaf on Day 3, let alone Day 1. But we didn't have to. We were right there, so we went back again and again.

In case you're not getting the message, we couldn't get enough of Tartine's bread during our stay. We knew Chad Robertson had a bread book slated for release in the fall even before we left for California, and we were already pretty excited, but after eating Tartine's truly memorable sourdough loaves for two weeks, we were gripped with anticipation. We were also gripped with the DTs. Montreal's bread situation has gotten more and more dire over the years--when we got back home, our store-bought loaves paled in comparison. Literally.

Our copy of Tartine Bread finally showed up on our doorstep in early October (none too soon!), and we were immediately impressed. The book is amazingly thorough: it works through the basic method for the basic country loaf in extraordinary detail, provides a number of tantalizing variations on this basic method, then moves on to cover baguettes and enriched breads (including English muffins, brioches, beignets, and croissants), before closing with over 100 pages of recipes involving days-old** bread.

It's also richly illustrated. Robertson's principal collaborator on the project was Eric Wolfinger, a cook/baker/surfer/photographer, and together they'd wisely decided that a proper bread book should be heavily illustrated. How else to teach amateurs what, exactly, to be looking for? How else to teach them to pay attention to how bread behaves?

But just as importantly, the book was inspiring. Weaved into it was a life story, one that involved love, travel, apprenticeship, dedication, collaboration, and surfing (yes, surfing), one that was motivated by a fundamental faith in that fabled "daily bread"--what Robertson calls that "elemental bread that sustained generations."

I was totally taken by the whole thing. I read it through once. I read it through twice. And then I really dug in. And, just as Robertson promised, the results were magical.

country 1 fig. c: country

Right from the start, my loaves showed great oven spring, they had beautiful burnished crusts, and they were amazingly tasty, characterized by a surprisingly sweet (not sour and tangy), rounded wheat flavor. With a bit of practice, they started to look almost professional.

whole-wheat bread fig. d: whole-wheat

How was I getting such satisfying results so quickly? Well, Tartine Bread isn't just a thorough book on baking bread--it's also been specially designed for the home baker, so that even novices can get professional results from a conventional oven. If you've tried Jim Lahey's now legendary no-knead baking method, aspects of Robertson's approach should be very familiar.

dutch oven & co. fig. e: dutch oven & co.

Like Lahey, Robertson employs the use of a Dutch oven in order to create the intensely hot and humid environment necessary to achieve a proper crust. Like Lahey, Robertson's dough is a much moister dough than you might be used to. It features an unusually high hydration level (75% in baker's percentages). This moistness is what makes Robertson's dough suitable for a no-knead method,* but it's also one of the reasons his recipe results in such a wonderfully tender crumb, not to mention a loaf with such staying power.

Tartine Bread was also rigorously tested for the home baker. Robertson assembled a team of test bakers to try out his Basic Country Bread recipe--the cornerstone of his method--then created a private blog so that notes could be circulated and data could be accumulated. The results were extraordinary:  "Many testers made exceptional bread, judged by professional standards--it was virtually indistinguishable from our own Tartine bread..." When it came time to assemble his book, Robertson realized that this test process held important lessons, and that profiling a few of his test bakers might provide his readers with the added encouragement they might need to roll up their sleeves and start making real bread at home.

tartine bread pix fig. f: Tartine bread pix

Finally, Tartine Bread isn't just richly illustrated, it's exhaustively photographed. Robertson worked closely with Eric Wolfinger on this book, and he took full advantage of his collaborator's skills as a photographer. There are a number of other excellent bread books out there that take pains to illustrate the processes of making bread in detail. Books like Jeffrey Hamelman's Bread: A Baker's Book of Techniques and Recipes and Rose Levy Beranbaum's The Bread Bible include some photographs, but rely mostly on line drawings. Jim Lahey's My Bread: The Revolutionary No-Work, No-Knead Method uses a lot of photographs, and it recognizes photography's ability to document step-by-step instructions in a way that goes beyond what line drawings can accomplish, but its use of photographs is timid compared to Tartine Bread.

While Lahey's photo-essay "The Basic No-Knead Bread Recipe in Pictures" is composed of 24 photographs, Robertson's instructions for his Basic Country Bread includes nearly 70 photographs, not including those that illustrate "Making a Starter." The difference here isn't only one of quantity. The seriality and precision of Wolfinger's photographs provide an invaluable reference when you're first getting used to the Tartine method. Together with the thoroughness of text (which is heavy on visual cues), they provide you with all the guidance you need to make successful loaves right from the start.

Results have been so good, and the experience of making real, honest-to-goodness sourdough at home has been so rewarding, that I've become a little obsessed. I haven't actually made that many of Robertson's bread recipes, to tell you the truth, but those I have made, I've made a lot of. So in addition to many, many loaves of the Basic Country Bread, I've made a bunch of walnut loaves, some polenta bread (with pumpkin seeds and rosemary!), some olive bread (with walnuts, lemon zest, and herbes de Provence!), and a few pizzas. Yeah, that's right, pizzas.***

There have been other signs of obsession, as well. Not only did I go out and purchase a 20 kg bag of white flour, not only did I photograph it (?),

oak 20 kg fig. g: 20 kg Oak

but I worked through that bag in about a month. I've also been taking bread photos--again, a lot of them. Whole loaves, like the photos above. Half loaves and cut loaves.

country 2 fig. h: still life 1

Slices.

walnut bread fig. i: still life 2

rorschach test fig. j: rorschach test

And a whole bunch of shots that highlight the bread's open structure.***

open structure 1
open structure 2 figs. k & l: open structure 1 & 2

No kidding. Baking sourdough does crazy things to you.

Just a few more notes:

Not only does Robertson insist that you don't need a professional bread baking oven to make professional quality bread, but he also insists that the flour you use isn't nearly as important as the process. This isn't to say that flour doesn't matter, or that all flours are created equal. Tests proved that the flour Robertson gets milled specially for Tartine resulted in the best loaves with the finest flavors. That said, combining conventional, supermarket-bought all-purpose flour with the Tartine method resulted in loaves that were professional quality and superior to the overwhelming majority of store-bought loaves. So there.

Robertson's method for making true sourdough bread is remarkably simple, but it still requires some investment. You're going to need some basic equipment, like a proper scale, a bench knife, a Dutch oven, etc., and you're going to need to be dedicated to reading through the process carefully, and being exact when it comes to following it. You also need to realize that while Robertson's method is somewhat less labor-intensive than other methods, it is time-intensive. The real secret to Robertson's bread has to do with letting the sourdough work its magic slowly and thoroughly. As Robertson puts it: "The baker's skill in managing fermentation, not the type of oven used, is what makes good bread. This fact makes Tartine Bread possible." So it does take a fair bit of time to get from feeding your starter to taking your finished loaf out of the oven, but the nature of the Tartine method is such that it's feasible to work sourdough bread baking into a busy schedule (although wouldn't you rather take your time, do it right, and enjoy the process?), and the book provides helpful strategies for doing so.

And, lastly, Tartine Bread isn't without its glitches (it is the first printing, after all)*****, but it's a remarkably rigorous book, and it's filled with pure inspiration from start to finish (from its Basic Country Bread, to its recipes for soups, salads, sandwiches, sides, and desserts), and I predict the book's impact on the state of baking in North America will be enormous. There was a reason Tartine Bread topped our list of cookbooks for 2010. There were a lot of great cookbooks that were released over the course of the year, but no other book held the potential to really shake things up that Tartine Bread does.

Long live "elemental bread"!

Tartine Bakery & Cafe, 600 Guerrero St., San Francisco, CA, (415) 487-2600

aj

p.s. Still need more convincing? For even more about Chad Robertson, Tartine Bakery, Tartine's Basic Country Bread, the test bakers, etc., check out Tartine's bread video.

* Instead of conventional kneading, his method relies on gently folding the dough in a bucket, a modern take on the tradition of trough kneading.

** Again, Tartine's loaves are so well made that they stale very slowly. They literally aren't stale enough on Day 2 to use in a recipe that calls for "day-old bread," hence, "days-old."

*** Robertson throws down on the topic of pizza, addressing some of the orthodoxies that have accompanied the pizza revolution of the last decade, and, in many ways, I think his common-sense approach is right on the money. He writes, "Our current pizza revival, with all the attitude, manifestos, and "secrets" (the flour! the water! the oven!), is amusing. Just start with good bread dough and a very hot baking stone, and you will end up with a great pizza." He's right, too. Get a handle on his Basic Country Bread recipe, and making amazing pizza at home is a snap. Seriously.

**** I, like so many others, was first inspired to find real French pain au levain after reading a profile of the late Lionel Poilâne in the pages of Smithsonian Magazine back in 1995 (you can find the abstract to the article here). I say "find," because for some reason, it never really occurred to me that I could make it at home. At least, not with a proper crust. Anyway, that article was a revelation, and it set me on a path to locate such bread so that I could taste what Poilâne was describing, but, more than anything, what I remember about the article was a photograph of a slice of his bread being held up to the light to show off its open structure.

***** For instance, the Whole-wheat Bread recipe (which is in process as I write) lists 20 grams of salt, but is unclear on when to add it. Whereas the Basic Country Bread recipe adds the salt (and a bit more water) to the dough after an initial resting period, the Whole-wheat Bread recipe, which requires more water because whole-wheat flour has a higher absorbency than white flour, adds all the water at once, and never mentions when to add the salt. Like many of the other recipes in the book, the Whole-wheat Bread recipe is a variation on the Basic Country Bread, and after a few different steps early on, it advises readers to "[follow] steps 5 through 9" of the Basic Country Bread recipe. Unfortunately, step 4 of the Basic Country Bread recipe is the one where the salt is added. Anyway, if you've worked through the Tartine method enough times, you figure it out.

Wednesday, December 01, 2010

Top Ten #38

Me'al Moun'ains

1. Metal Mountains, "Structures in the Sun" (Amish Records)

2. Errol Morris' First Person: The Complete Series

country 1

3. Tartine basic country bread

4. W. Somerset Maugham, Of Human Bondage

wade in the water

5. Destroyer, "Archer on the Beach/Grief Point" 12" (feat. Tim Hecker and Loscil) (Merge Records)

6. Kermit Lynch, Adventures on the Wine Route: A Wine Buyer's Tour of France

blue hills

7. Michael Hurley, Blue Hills (Mississippi Records)

8. Soirée Choucroute, Pop!, feat. James MacGuire, Nov. 29, 2010

9. Anvil: The Story of Anvil, dir. Gervasi

black moun'ains

10. Black Mountain, Wilderness Heart (Jagjaguwar)

aj

Tuesday, October 19, 2010

Top Ten #37


1. Chad Robertson, Tartine Bread

2. hickory-smoked pulled pork bbq + bbq chicken w/ all the fixings

3. The White Ribbon, dir. Haneke


4. Charlie Christian, Solo Flight: The Genius of Charlie Christian

5. F. Scott Fitzgerald, Tender is the Night

6. eating your way across Northern California


7. Kurt Vile, Childish Prodigy

P1010063

8. apple season

9. Bandol/Alsace Wine Night w/ friends

10. The Trouble With Harry, dir. Hitchcock

Thursday, November 27, 2008

AEB classics #75: Perfect Pumpkin Pie

one-pie pumpkin fig. a: One-Pie Pumpkin

This is the best pumpkin pie recipe either of us have ever come across.

When my Dad developed a sudden and rather unexpected passion for pumpkin pie late in life, this pumpkin pie leapfrogged right into his dessert Pantheon. Michelle surprised him with a freshly baked Perfect Pumpkin Pie once and you'd have thought he'd just tasted ambrosia. He never stopped talking about it.

Anyway, it's quick and easy too. Perfect for any last-minute Thanksgiving Day plans.

Perfect Pumpkin Pie

part 1: sweet crust

1/2 cup butter, cut into small cubes
1/2 cup sugar
1/8 tsp. salt
1 3/4 cups flour
1 egg

Place the sugar, salt and flour in a bowl and stir together. Add the butter and work it into the dry ingredients until the mixture is homogeneous. Add the egg and mix well, rubbing the dough between your hands until no egg streaks remain. Wrap in plastic and chill for 30 min. Roll out on a lightly floured surface and place in a 9" pie shell. Trim edge and chill again, wrapped. To partially bake, line it with parchment paper and fill with dry rice or beans and bake for 10-15 min. at 375°F until golden. Let cool.

part 2: filling & completion

2 cups pumpkin puree *
3 eggs
1 egg yolk
1 cup heavy cream
3 Tbsp. brandy
3/4 cup sugar
1 tsp. salt
1 tsp. ground cinnamon
1 tsp. ground ginger
1/8 tsp. ground cloves
1/8 tsp. grated nutmeg
1/8 tsp. ground black pepper

Preheat the oven to 325°F. Mix all of the ingredients together until smooth and pour into a partially baked 9" pie shell. Bake until the filling sets, about 1 hour. Let cool and serve with lightly whipped cream.


[based on a recipe from Tartine by Elizabeth Pruitt and Chad Robertson]

Happy Thanksgiving.

am/km

* By the way, as much as we love the Warholesque charms of One-Pie brand pumpkin pie filling, we recommend using an unsweetened, pure pumpkin pie filling such as E.D. Smith brand for this particular recipe.

Tuesday, September 13, 2005

Revelation 8: Tartine


As you can well imagine, a good part of our San Francisco vacation was spent walking to and from various pastry and chocolate shops in order to find "the best of the Bay." I am notoriously picky when it comes to pastries. Since becoming a professional, I've become even pickier. [Case in point: I have no favourite pastry shop in Montreal. There really aren't any worth speaking of. Thankfully, this will soon change: see note below.] I was lucky that Anthony indulged me as much as he did. We went to some beautiful-looking-but-bad-tasting places, okay-looking-but-horrible-tasting places, and the double-whammy: bad-looking and bad-tasting. Horror of horrors, I was even disappointed by the desserts I got at a couple of the Bay Area's top restaurants. Maybe I just caught them on off nights. Then again, maybe not.

Anyway, over and over again, Anthony had to put up with my oftentimes catty comments about those desserts that didn't make the cut. In fact, it's quite possible that I have some kind of strange, pastry-related form of Tourette's. One place we went to gave me a sample of their chocolates and upon trying one, without thinking, I exclaimed: "These are terrible. Next!" You should have seen the look on poor Anthony's face.

Also on my hitlist were all those "olde tyme" confectionery shops that claimed to have handmade candies, but were all vintage show without any vintage substance. I'm not sure whether Wacky Packs were ever handmade, but I sure laughed when I saw a whole stack of them at one shop.

By far and away, the best chocolate shop we tried was Recchiuti's at the Ferry Terminal (and we did try many other SF mainstays). Their chocolate was the best, their fillings were subtle with great texture, and their vanilla marshmallow was the best I've ever had. Don't get me started on their chocolate-covered fleur de sel caramels. Let's just say they rated 100%. Maybe 110%. In fact, we even staged our own caramels taste-test while we were at the Ferry Terminal, and Recchiuti's caramels blew everyone else's out of the, uh, water.


My favourite pastry shop was Tartine. As far as I'm concerned, they knocked the competition out cold. At least once a day, I would say, "You know, we could go to Tartine..." Morning, noon, and night. We tried their amazing morning bun--candied orange peel and cinnamon-- and their excellent croissants, walnut bread, mexican wedding cakes, coconut macaroons, walnut cookies, chocolate croissants, and buttermilk scones, and, as pictured above, a lovely lemon tart. Perfect. Their cakes were the best-looking, and I can only assume best-tasting, since I didn't buy one. Their bread was amazing, and only available after 4:00 p.m. I respect businesses who call the shots. When you're making the kind of high-calibre loaves Tartine is making, the people listen. The line-ups are regularly down the block. I just wish we had something like Tartine in Montreal!*

Acme Bread Company's breads are the best I found in San Francisco, and they are availble all day(!). Many retail stores carry their bread, but it's always best to go to the source. The owner used to bake bread at Chez Panisse and it shows. It is truly exceptional bread.

Recchiuti's, One Ferry Building, shop 30, San Francisco, www.recchiuticonfections.com

Tartine, 600 Guerrero Street at 18th San Francisco, www.tartinebakery.com

Acme Bread Company, One Ferry Building, shop 15, San Francisco or 1601 San Pablo Ave, Berkeley

m

* Hope is on the horizon. My friend Reema is opening a cake shop this Sunday! Go and find out what we've all been missing:Cocoa Locale 4807 Parc Ave., Montreal, Tues-Sun, 11-6ish. Good luck, Reema!