Showing posts with label shrimp. Show all posts

Wednesday, August 13, 2014

Ail, Ail, Ma'am!

aioli monstre fig. a:  petit aïoli monstre

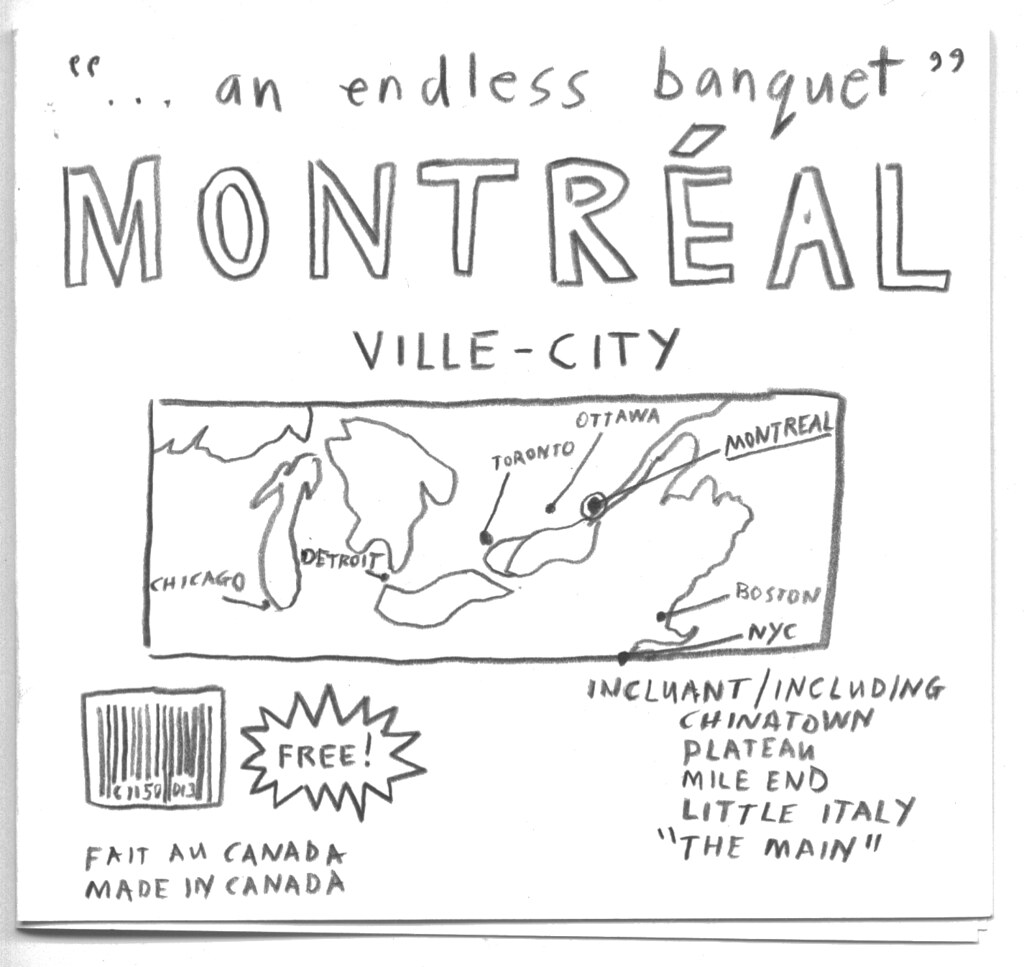
Tomorrow, Thursday, August 14, 2014, le grand aïoli is back, and this time it's even grander than before.  In fact, it's going to be so huge, so extraordinary, that this time around they're billing it as un aïoli monstre (!).

Once again, this grand aïoli pools together the prodigious talents of the Foodlab, Oenopole, and the Birri Bros.

And once again, this aïoli monstre is inspired by and dedicated to our patron saints of Provençal cuisine:  Lulu Peyraud and Richard Olney.

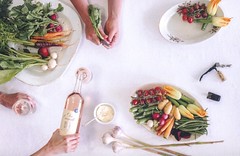
If you're not exactly clear on the concept, the good folks at Oenopole have summarized it this way:  mange tes légumes et bois du rosé ("eat your vegetables and drink some rosé!").  In other words, all of Birri's most beautiful August vegetables, lovingly prepared by Michelle and Seth and served with generous amounts of Lulu's legendary aïoli, plus all of Oenopole's most delicious rosés.  But I have it on good authority that there will also be Provençal-style shrimp and Atlantic lobster on offer to sweeten the deal even further.

Aïoli Monstre
SAT Foodlab / Labo Culinaire
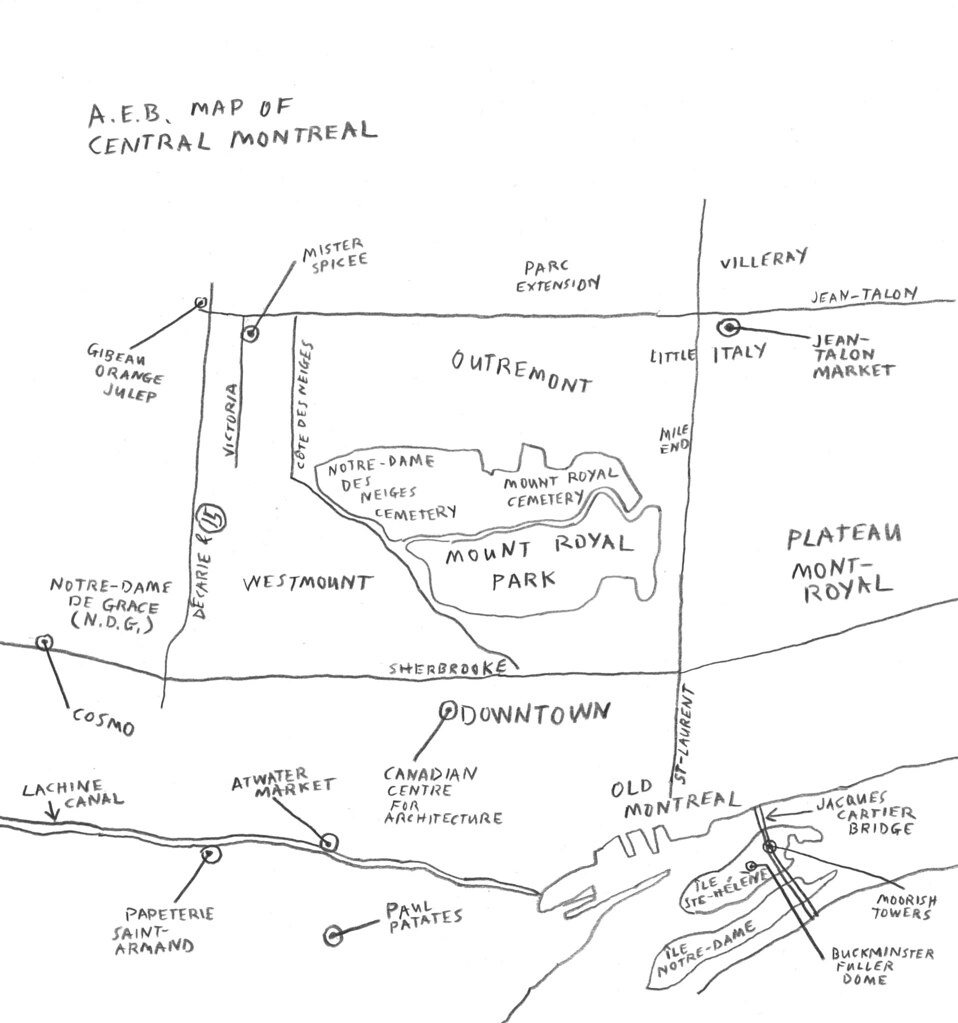
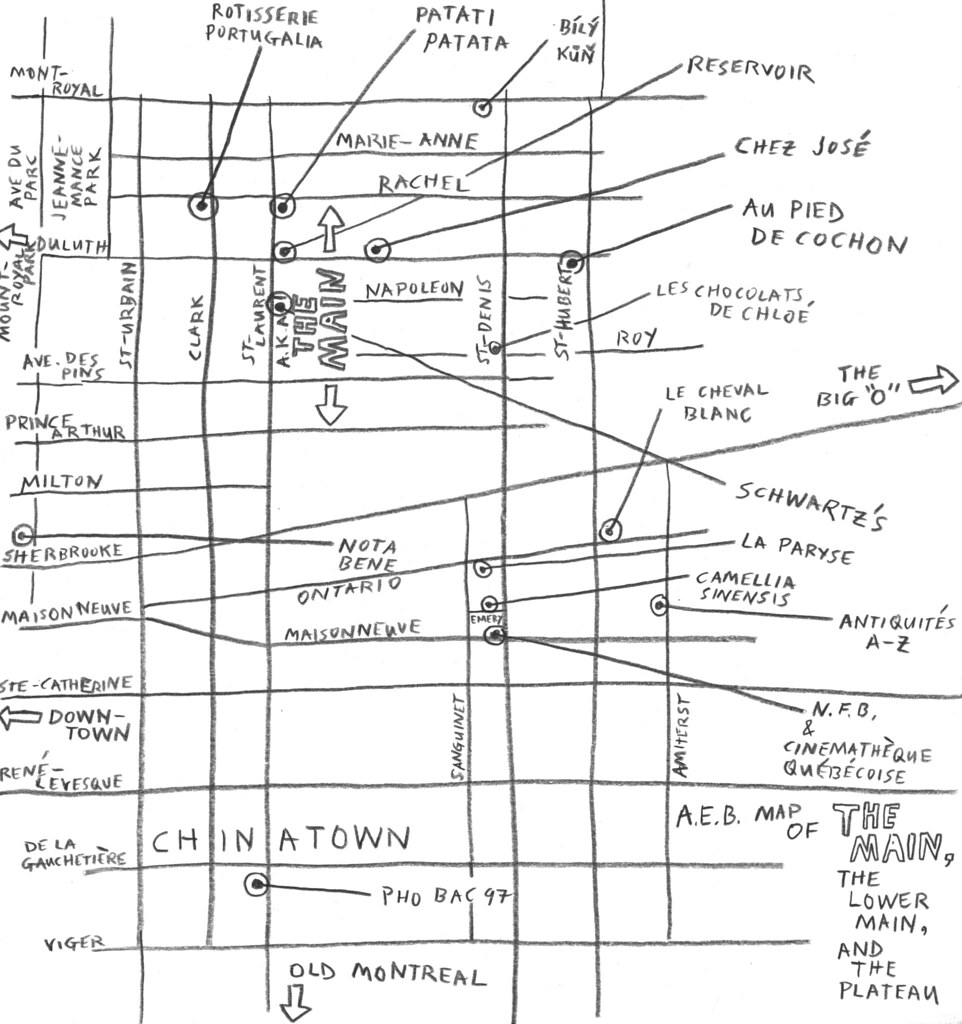
1201 boulevard St-Laurent
Montreal, QC
Thursday, August 14, 2014
5:00 p.m. - 10:00 p.m.
rain or shine! (but it's always sunny when a grand aïoli is being served)

Michelle's so excited about this grand aïoli that I heard her say, "You'd be a fool to miss it."  I'm not sure if she meant me personally, or whether she meant "you" more generally.  Either way, I'm not taking any chances.  I know where I'm going to be tomorrow night.

aj


Tuesday, July 15, 2014

Cape Cod Almighty!

Well, Arthur threatened to spoil our glorious return to Cape Cod, but, when the storm had finally passed and the winds had settled, the skies cleared up beautifully and things got back to normal.

cap'n ahab's fig. a:  summer off the Cape

Our 2013 trip to Cape Cod had been such a hit that we were eager to get back and do it all over again.  And because we were there for the same stretch of time, and we'd loved the way our last trip had played out, we were happy to basically replicate our 2013 itinerary.

This meant that there were a few major priorities to our trip:

1.  bookstores, book sales, thrift shops & flea markets
parnassus book service, Cape Cod fig. b:  books al fresco

We probably should commission a custom bumper sticker for our car that reads "I brake for bookstores, book sales, thrift shops, flea markets, particularly promising-looking garage sales, farm stands, pie shops, jam stores, sustainable seafood markets, well-curated wine shops, and discount beverage stores," because we do--we make frequent stops at all these kinds of enterprises, especially when we're on Cape Cod.

We started making such stops almost immediately after we crossed the Sagamore Bridge and began following the 6A (a.k.a., the Old King's Highway) east across the northern edge of the Cape.  These stops included the Parnassus Book Service in Yarmouth Port, which specializes in many things (Americana, Cape Codiana, etc.), but is especially notable for its extensive collection of the work of local legend Edward Gorey.

The most important stop on our Cape Cod Collectibles tour was without a doubt a return visit to the Wellfleet Flea Market,

Wellfleet flea market 2 fig. c:  magic carpets

which takes place on the grounds of the Wellfleet Cinemas drive-in theater, on the very southern edge of town, just north of North Eastham, and a few miles from the center of town.

Wellfleet flea market fig. d:  virtual windows

You've got to head up closer to the screen to get to "the good stuff" (the stuff that's actually old and/or holds real value, as well as the true Cape Cod characters who are selling it).  This is one of our favourite flea markets anywhere, and both times we've visited we've scored plenty of great finds, but our absolute favourite stand is the "Local Folk Art" stand (formerly known as the Cape Recycled Art Project, or C.R.A.P.)

folk art, Wellfleet, MA fig. e:  C.R.A.P.

where we bought the beach plums and the wild apricots last year.  We had a longer conversation with Mike (a.k.a., the Man From C.R.A.P.) this time around, and we thanked for him for his foraged fruit and told him about the preserves we made with them.  Turns out his fruit foraging prowess has earned him the nickname "Beach Plum Mike."  Of course, he didn't have any plums or apricots when we saw him, because it wasn't quite the season, but he did have a lot of whales, mermaids, narwhals, fish, and birds, and his style ranges from American Primitive to Folk Whimsy.  Either way, he's one of the best folk artists I've come across over the years, and we made a point of making some new acquisitions.
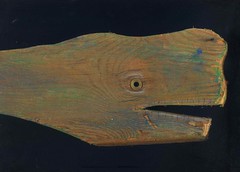
wooden whale fig. f:  whale

And you'll be happy to know that our Cape Cod bird instantly befriended our Kamouraska eel.
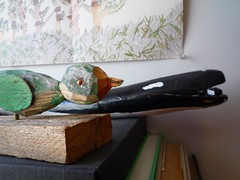
bird & eel fig. g:  bird & eel

2.  Wellfleet Center
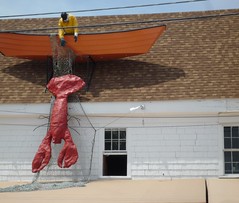
we grow 'em bigger! fig. h:  we grow 'em bigger!

Speaking of whimsy:  there's a fair bit of it in Wellfleet Center, both in the heart of town, and out by the town pier.
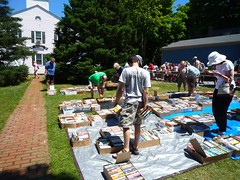
wellfleet book sale fig. i:  book nerds

They also know how to put on a great book sale (see #1) in Wellfleet,
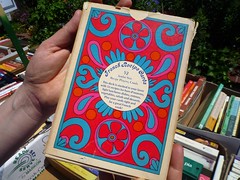
Wellfleet book sale find fig. j:  French psychedelia

and you never know what you might find, like this bizarre collection of 52 semi-psychedelic "jumbo-size recipe playing cards" featuring the cuisine of France (?).

Sample recipe card:  the 10 of spades is "Poulet aux Amandes (Chicken in White Wine with Almonds)."

Not clear on the concept?  Here, let me explain:  "Winning luncheons and dinners are in the cards!  Deal from this complete deck of delicious hors d'oeuvres, light luncheon dishes, entrees, vegetables, salads and desserts.  French Recipe Cards are a pack of fun!  Use them for games... as hostess gifts... for party favors."
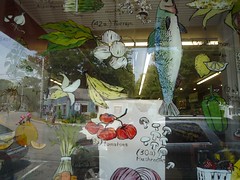
Wellfleet Market fig. k:  window shopping

The Wellfleet Market is an anchor of the community, and their meat department has provided me with all the quality spare ribs I've required over the last couple of years.  They also know how to decorate their windows.

But our very favourite place in Wellfleet Center is Hatch's, a small operation just off the Town Hall that consists of two halves:  Hatch's Produce, a green grocer, which carries a lot of locally grown fruits and vegetables (in season),
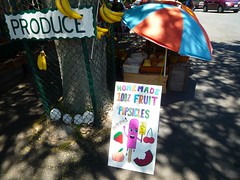
Hatch's produce market fig. l:  Hatch's Produce

and Hatch's Fish Market, which may very well be our favourite place for seafood.
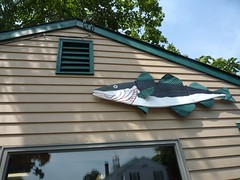
Hatch's fish market, Wellfleet fig. m:  Hatch's Fish Market

We were just blown away by the selection, the freshness, and the affordability of Hatch's seafood last year, and this year we were just as impressed.  Once again, we didn't hold back, and, once again, we treated our hosts to a seafood feast on Sunday night, featuring local littleneck clams, wild shrimp, local scallops, and local flounder.

If you don't have access to a kitchen, you can always just pay a trip to Mac's on the pier.  There you'll find lobster rolls and other types of seafood sandwiches, oysters on the half-shell, and steamed littleneck clams that are worth waiting on.

waiting on the clams fig. n:  waiting for my clams

And when you visit Wellfleet, be sure to pay a trip to one of the stunning local beaches, preferably oceanside (see below).

3.  Ice Cream

The motto of Sundae School, our favourite Cape Cod ice cream shop and soda fountain, is "Don't skip Sundae School," and, believe me, we wouldn't dream of it.  Sundae School in Harwich Port is one of our favourite ice cream shops of all-time, and, for us, Bass River Mud is their showstopper.  Rich coffee ice cream, roasted almonds, chocolate chunks, and fudge swirl--it's a flavor that lives up to its evocative name,
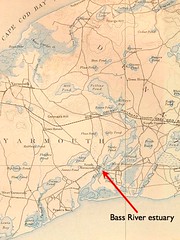
Bass River fig. o:  Bass River estuary

and it's hard for us to imagine a better combination, or a more successful version of this combination.  I meant to take a photograph of it immediately after receiving my cone, but I literally couldn't wait long enough to fire off a shot.  This is what a regular serving of Bass River Mud looks like after it's half eaten.
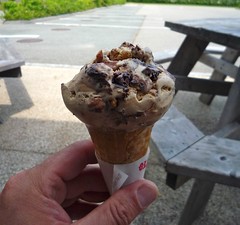
bass river mud fig. p:  Bass River Mud

4.  Barbecue

Monday in Harwich Port has become our barbecue day.  I pick up a mess of ribs at the Wellfleet Market on Sunday.  I rub them with my special blend
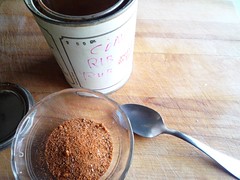
AEB competition rib rub fig. q:  special blend

and let the flavours infuse in the refrigerator overnight.  And on Monday afternoon, between swims, I put the 3-2-1 method to work.  Monday night we have ourselves a good old-fashioned rib-pickin', with all the trimmings, and we wash it all down with bourbon and rye.

5.  Swimming

We go swimming as often as we can.  That's the rule:  get it while you can.

The waters you find off the "tricep" of Cape Cod, facing Nantucket and Martha's Vineyard, get pretty nice and warm and the waves tend to be smaller and choppier.

The waters you find off the "forearm" of Cape Cod, facing the ocean, are bracing, but they're also a remarkably beautiful blue-green, the waves tend to be bigger and better-formed, and the dunes that line the coast are often monumental.

this way to paradise fig. r:  this way to paradise

This year, it was Marconi Beach, near Wellfleet, that took our breath away.  But, believe me, every single swim, on both coasts of Cape Cod, was a great swim.

6.  Souvenirs

It's important to commemorate a summer beach vacation with souvenirs.
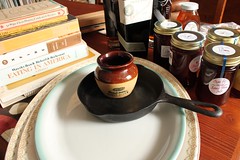
souvenirs of Cape Cod fig. s:  s is for souvenirs

T-shirts, jam, used books, collectibles, bourbon--whatever it takes.  A trip like this can be such a dream come true, such a wonderful blur, that when you get back home you might find yourself needing tangible evidence that you were actually there.

Our favourite souvenirs are edible ones, and the thing we knew we'd miss the most when we left Cape Cod was the seafood, so we made a point of scooting up to Wellfleet and popping into Hatch's again before we headed back to Montreal.  Once again, we picked up a bunch of local specialties, like shrimp, scallops, and cod (natch), but the treat we were most excited about were our two dozen littleneck clams.  Those Wellfleet littlenecks had been one of the highlights of our trip, and we were determined to extend the good tidings all the way back home.  We weren't exactly sure what we were going to do with them, but on the drive back I had a flash of inspiration:  clam pizza!

So the day after, that's exactly what I did:  I made a couple of clam pies using the Roberta's method.

Once you've got your two pizza doughs ready to be baked...

Clam Pizza 
24 littleneck clams
2 x 125g buffalo mozzarella or fior di latte
parsley, minced
chives, minced
red pepper flakes
reserved clam juice
extra-virgin olive oil
lemon wedges 
Place a pizza stone in your oven, and preheat it as high as your oven will go.  I recommend doing so at least an hour before you plan on baking. 
Wash and scrub your littleneck clams, rinsing them several times.
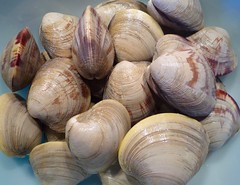
Untitled fig. t:  raw
Place them in a medium pot with 1/2" of salted water and cover the pot.  Bring the pot to a boil, turn the heat down to medium-high, and steam the clams until all the shells have opened.  Generally 6-10 minutes is how long it's going to take, but these super-fresh Wellfleet littlenecks only took about 4 minutes.  The common wisdom is to discard those clams that don't open.  
Scoop the clams into a bowl, 
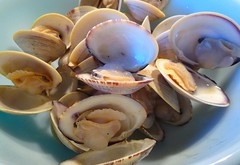
littleneck clams (cooked) fig. u:  cooked
making sure to reserve the clam broth in the pot. 
When your clams have cooled enough to handle, remove the clam meat from the shells and mince them on a cutting board.  Divide the minced clam meat into two equal portions.   
Slice both portions of mozzarella as thinly as possible and gather together your other ingredients. 
Add about a tablespoon of your clam broth to about two tablespoons of extra-virgin olive oil and stir well.  This will be your drizzling oil.  (Save the rest of the clam broth for another use, like making spaghetti with clam sauce, but make sure to use it while it's still fresh.)
When your oven is ready to go, stretch and form your pizza dough into a 12" round with a properly shaped lip to it.  Spread half your mozzarella slices over your dough, placing the larger pieces closer toward the rim and the smaller pieces closer toward the center.  (Buffalo mozzarella gives off a considerable amount of liquid.  When you're baking a thin-crust, "white" pie like this, you want to try to avoid having liquid pooling in the center as much as possible.) 
Scatter half your clam meat evenly over the pie.  Sprinkle minced parsley, minced chives, and red pepper flakes over top.  Grind some black pepper overtop and sprinkle a pinch of sea salt.  Drizzle the pie with your olive oil/clam broth concoction.  Place it in the oven and bake following the Roberta's method. 
Remove your pie from the oven when it's baked to perfection and allow it to cool for about a minute.  This will allow the molten cheese to set and make it easier for the pizza to be sliced.  It will also make it easier for the pizza to be eaten, and help you to avoid law suits.
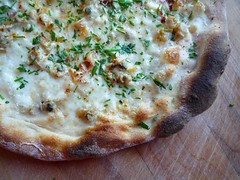
clam pizza 1 fig. v:  clam pie 1
Serve with lemon wedges and encourage your guests to squeeze a little lemon juice over their slices.
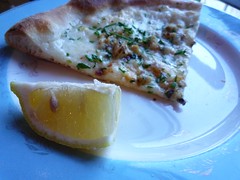
clam pizza 2 fig. w:  clam pie 2
Repeat instructions with dough #2.
The AEB Clam Pizza was a tribute to the clam pie we had at Motorino back in April, but it was also a pretty tasty tribute to Wellfleet and Cape Cod.  Those clams were so tender, so briny, so vibrant, it was almost like we'd never left.

Of course, in order to make it possible to bring back edible souvenirs such as these on a road trip such as this, a cooler is essential.  Make sure to buy enough ice to keep everything fresh on the long drive back.

Postscript:  Yes, we miss the towns, the beaches, and the seafood of Cape Cod, but it wouldn't mean quite as much without good friends.  What we really miss most of all is experiencing Cape Cod with our close friends R & MA and the rest of the Harwich Port Crew (you know who you are!)--the beers, wine, and cocktails; the al fresco dining; the beach time; the laughs; the feats of sporting prowess; the dance moves; the trips down Memory Lane; the word play...  OMC!  You guys are awesome!

aj
Tuesday, June 22, 2010

Grits, Asian-American Style

anson mills antebellum white grits fig. a: Anson Mills coarse white grits

A stamped white paper bag, a Pyrex measuring cup, and some white grits.

Doesn't look like much, I know. But those aren't just any grits, they're Anson Mills antebellum coarse white grits, the grits David Chang has called "the killerest grits ever."

These grits being "the killerest," you could make them straight-up, add some salt and pepper, add a little butter, and you'd be sitting pretty, but you're not going to settle for straight-up, are you? Didn't think so.

No, you're going to follow David Chang and Team Momofuku on one of their flights of fancy. People often misunderstand the Momofuku experience as being just another example of "Asian fusion." Now, there's no question that there's some fusion going on within the Momofuku empire, but there's also quite a bit of fission. And, yes, Asian elements figure prominently. But there's a side to David Chang that's almost Kenny Shopsin-like. As far as I know, he hasn't invented any countries, then set about creating their national cuisines, but there's more imagination than one generally associates with the term fusion. The narratives are richer. They're more profane. They're also a hell of a lot funnier.

As Chang describes things, Momofuku Noodle Bar's Shrimp & Grits was a pivotal dish, because aside from the Asianesque broth that Chang used to make the grits, and that you couldn't actually see, "there was no Asian foundation, relation, or appearance to the dish. No other "noodle bar" was serving shrimp and grits."

The idea, the dream, behind the dish was to take a down-home Southern soul food classic, disarticulate it, ruminate on it, and then reanimate it in Momofuku's laboratories:

I imagined what it would be like if my ancestors had ended up in Charleston, South Carolina, a few generations before I was born. They would have eaten corn, they would have eaten grits, they would have cooked with bacon. Or, if Southerners were magically transplanted to Korea, they'd eat jook instead of grits at breakfast. And you know a people who can handle the salty power of a country ham certainly could have gotten down with kimchi. I imagined a Japanese cook making grits--you know he'd boil it in dashi and season it with soy.

I guess these were all conversations I was having with myself. I didn't want to be cooking shitty fusion food. I consoled myself by thinking about how Vietnamese cuisine and Cajun cooking adapted French techniques into something that might have looked French but tasted totally different. But it was with this dish that I decided--or accepted--that if we reached past "tradition" to create the truest and best version of a dish for our own palates, then what we were doing wasn't bullshit.
Chang recommends making this dish with either his Ramen Broth or his Bacon Dashi. We went with the latter a) because it's way simpler, b) because it's way cheaper to make, and c) because it's another great example of the Momofuku Philosophy at play. As Chang puts it:
I can't overstate the significance of bacon dashi to us at Momofuku. It's not the dashi itself--though it is delicious--but the thought process that went into it. The successful transposition of bacon from Tennessee for Japanese dried and smoked fish was an important early success for us, and it continues to be a driving inspiration of how we cook.

We respect tradition and we revere many traditional flavor profiles, but we do not subscribe to the idea that there's one set of blueprints that everyone should follow.
So the following are Chang's instructions (more or less verbatim), using Momofuku's Bacon Dashi.

Still can't see what all the fuss is about? Well, here goes:

s& g:  before fig. b: before

Momofuku Shrimp & Grits

2 cups water
2 cups white or yellow quick-cooking grits, preferably from Anson Mills (SC)
2 cups Bacon Dashi (recipe follows)
2 tablespoons light soy sauce, such as usukuchi
kosher salt and freshly ground black pepper
8 tbsp unsalted butter, cut into pieces
1/2 pound smoky bacon, such as Benton's (TN) or North Country Smokehouse (NH), cut crosswise into 1- to 1 1/2-inch-long lardons
1 pound medium shrimp (16 to 20 count), shelled
2 tbsp grapeseed or other neutral oil, such as canola
4 freshly poached eggs
1/2 cup chopped scallions, greens and whites included

Combine the water and grits and soak the grits overnight (or for at least 8 hours) in the pot you'll cook them in.

Drain the grits, add the broth to the grits, and bring to a simmer over medium-high heat, whisking all the while. Continue to whisk for 5 minutes after the liquid simmers, then turn the heat down to low. You'll reach "first starch"--the point at which the fine corn particles thicken the liquid just enough to suspend the larger particles--after 5 minutes, and it's crucial to whisk constantly until you reach that point, and to turn the heat down immediately afterwards.

Add the soy sauce, a large pinch of salt, and some freshly ground black pepper. Keep the heat low and whisk regularly if not constantly; the grits should be thickening, undulating, and letting occasional gasps of steam bubble up and out. Soaked grits will be cooked after about 10 minutes over low heat. They're ready when they're no longer grainy, and they've become thick and unctuous.

Add the butter, stirring until it has melted and been absorbed into the grits. Taste them and add additional salt and pepper as needed. Set aside, covered to keep warm, while you get the rest of the dish in order (or serve them at once if you can't take it anymore and you just want to eat them solo).

Put the shrimp in a mixing bowl, pour the oil over them, and add a couple pinches of salt. Toss them in the oil and salt until they're coated. Set aside while you take care of the bacon.

Cook the bacon in a 12-inch cast-iron skillet over medium heat until the lardons have shrunk to about half their original size and are crispy, about 5 to 6 minutes. Remove the bacon with a slotted spoon and drain them on paper towels. Drain the bacon fat from the pan and reserve for another later use. Return the pan to the stove.

Make sure you've got your eggs poached and ready to go. They're ready? Good. Proceed.

Wipe the pan cleanish with a paper towel and turn the heat up to high. Cook the shrimp in two batches. As soon as the shrimp hit the pan, press down on them, using a bacon press, the back of a big spatula, a flattish pot lid, or a smaller pan--whatever works (we've found that a flattish pot lid works best for us). Sear the shrimp for about 1 minute on the first side. Watch the shrimp closely. As the gray-pink flesh of the raw shrimp gradually turns white in the side pressed against hot pan, and when that white line creeps about 40% of the way up the shrimp, flip them and press down on the second side. Sear that side only long enough to brown them a bit, about 30-45 seconds. Ideally, they should be just slightly shy of cooked when you pull them from the pan--they'll continue to cook after they come out of the pan. Use your judgment. Cook them a little longer if you prefer, but, remember, nobody likes overcooked shrimp. Nobody. Not even you.

Make up plates for 4. Shallow soup plates are ideal. Start with a big helping of grits, nestle a poached egg in the middle, and arrange 1/4 of the bacon, 1/4 of the shrimp, and 1/4 of the scallions in separate piles around the edge. Serve at once. Savor.

Serves 4.

Momofuku Bacon Dashi

2 x 3-by-6-inch pieces of kombu
8 cups water
1/2 pound smoky bacon, such as Benton's (TN) or North Country Smokehouse (NH)

Rinse the kombu under running water, then combine it with the water in a medium saucepan. Bring the water to a simmer over medium heat, then turn off the stove. Let steep for 10 minutes

Remove the kombu from the pot and add the bacon. Bring to a boil, then turn the heat down so that the water simmers gently, and simmer for 30 minutes.

Strain the bacon from the dashi, and chill the broth until the fat separates and hardens into a solid cap on top of it. Remove and discard the fat and use the dashi or store it. Bacon dashi will keep, covered, for a few days in the refrigerator. You can also freeze it for later use.*

Makes 2 quarts. You'll only need 2 cups of this for the shrimp & grits, so you'll have plenty left over for other uses.

[both recipes from Momofuku by David Chang and Peter Meehan]
The resultant dish is one that's remarkably subtle, but utterly irrepressible. When I finished making the dish the first time, I remember saying to Michelle that I was surprised that the recipe didn't call for some kind of Asian-inflected sauce that you'd drizzle overtop, but then I went and took my first bite and suddenly I understood.

The taste sensation comes from below. It's deep in the grits, it's released by the butter that finishes the grits, and it's transformed into something that's positively rapturous when you take your fork and release the egg yolk and stir it up with the grits, the shrimp, the egg, the bacon, and the scallions.

s & g:  after fig. c: after

Are you starting to get it?

aj

P.S. A note on sources: as I've mentioned before, quality shrimp can be hard to find in Montreal, and this dish requires some reasonably fresh, juicy, tasty shrimp, so don't bother making it if you're not satisfied with the product at your local fishmonger, or, better yet, shop around. Sometimes quality can vary greatly from one poissonerie to the next. The best shrimp we've found in recent months have been at Poissonerie Shamrock (7015 Casgrain Ave., 272-5612) and at Norref (4900 Molson St., 593-9999).

You can use other brands of grits, of course, but Anson Mills' grits are pretty killer. Be sure to use quick-cooking grits, though, or you'll find yourself stirring furiously for an awfully long time.

* Among other things, Chang claims it's great with clams. I haven't had the chance to test this out yet, but I believe him.

Monday, November 05, 2007

Tuesday Night Gumbo, Sunday-style

shrimp & oyster gumbo fig. a: late that night, Michelle sat down and started in on her bowl of gumbo

I suppose our 3rd anniversary celebrations here at "...an endless banquet" could have kicked off with the traditional 3rd anniversary gift (leather!), but we opted for gumbo instead. This means we've now celebrated our anniversary three different ways in three years. It also means that without even realizing it (until now, that is) we've been in the process of creating our very own set of food-related anniversary traditions, suitable for for all those who prefer apples over paper, barbecued ribs over cotton, gumbo over leather (or gumbo and leather over just leather). To recap:

1st anniversary
traditional: paper
modern: clocks
AEB: apples

2nd anniversary
traditional: cotton
modern: China
AEB: BBQ ribs

3rd anniversary
traditional: leather
modern: crystal
AEB: gumbo (and leather, if you so desire)

What tradition will AEB's fourth anniversary initiate? Stay tuned...

Anyway, there's obviously something about this time of year that gets me thinking about and a-hankering for gumbo, because although gumbo (in all its varieties) is seasonally-appropriate at any time of year, November has tended to be my most consistent gumbo month over the last few years (in fact, the last time I wrote on the subject was almost exactly two years ago). Weather is a factor, no doubt, but this time around it also had to do with the arrival of oyster season. I'd never made a gumbo with oysters before for some bizarre reason, even though a shared love of oysters is one of the strongest commonalities linking the cuisine of Cajun Louisiana with that of Quebec. Why? I wasn't 100% sure, but it probably had/has a lot to do with the fact that I'm such a big fan of oysters on the half-shell that I lack the self-control needed to shuck oysters for any reason other than immediate consumption. This time, however, armed with a new gumbo recipe (shrimp and oyster!) that I was eager to give a test-ride, I pledged to change all of that.

The recipe came from our good buddies the Lee Bros, who we still don't actually know, but at this point, having posted about a number of their recipes, we might as well. As I've mentioned before, a number of the Lees more classic recipes are offered up in pairs: "Tuesday night" versions versus "Sunday night" ones. Gumbo is no exception, and here not only does the "Tuesday night" gumbo amount to a simplified version of the "Sunday night" gumbo, but it's also a 100% seafood gumbo and that's what I was craving. [The "Sunday night" gumbo, by comparison, consists of what you might call a meat-lover's "home run": chicken (in the form of gizzards), beef (1 pound of beef round, beef shank, flank steak, or skirt steak), seafood (1 pound of shrimp, 6 blue crabs, and 24 oysters), and pork (in the form of Cajun andouille, or kielbasa)!] There were things about the "Tuesday night" version that I wasn't crazy about and that I intended to change--#1 being its lack of a roux*--but it also contained a trick or two that I found mighty intriguing.

Shrimp and Oyster Gumbo

1 1/2 lb headless large fresh shrimp (25-30 count)

broth:
2 1/2 qts water
homemade shrimp boil [ directions here] or Old Bay seasoning
3 bay leaves
2 celery stalks, chopped

1/2 cup canola or peanut oil
1/2 cup all-purpose flour
3 cloves garlic, minced
1 cup yellow onion, diced
1 large red bell pepper, diced
1 celery stalk, diced
1 tsp kosher salt
1/2 tsp freshly ground black pepper
1/2 tsp cayenne pepper (optional)
1 28-oz can chopped tomatoes
1 tbsp thyme, finely minced
24-36 shucked oysters, with their liquor
1 tbsp gumbo filé powder

Peel the shrimp (deveining them in the process, if you prefer) and put them aside in a bowl. Place the shells in a large pot, add the water, the shrimp boil or Old Bay seasoning, the bay leaves, and the celery and simmer over medium heat for 30-60 minutes. Strain the broth and return it to your pot, keeping it warm over low heat.

In a large skillet, add the oil and the flour and make a proper cajun roux, nutty brown or darker, being careful not to scorch the roux at any time. [For complete instructions consult our earlier post on gumbo.]

When your roux has reached the depth you desire, add the onion carefully (the roux is extremely hot and the onion may cause it to spatter a bit) and sauté over medium heat for 5-10 minutes, stirring constantly. Then add the garlic, the bell pepper, the celery, the salt, the black pepper, and, if you desire, the cayenne pepper, and sauté until all the vegetables have softened, about 5-10 minutes.

Add the vegetable/roux mixture to the shrimp broth, stirring (or even whisking) constantly to incorporate it smoothly. Add the tomatoes and their liquid and stir. Bring to a vigorous simmer over medium-high heat, reduce the heat to low, and simmer for 30-60 minutes. The broth should reduce a fair bit and the flavors should intensify considerably. Adjust the seasoning, adding more salt and freshly ground black pepper as needed, then add the gumbo filé and stir.

Turn off the heat. Add the peeled shrimp, the oysters, and the oyster liquor (the magic elixir) to the broth and stir. Let stand about about 5 minutes, until the shrimp are cooked through, perfectly tender and juicy. Serve the gumbo in wide bowls over hot white rice with cold beer and a selection of hot sauces.

Important note: For optimal flavor, it's apparently always best to allow your gumbo to "cure" for 24 hours in the refrigerator, but I've never had the will power to do so. If you do, add the shrimp and oysters only after you've reheated the gumbo, lest the shrimp become tough and the oysters bitter (because of the acidity of the tomatoes). Also, if you think you might have leftovers, you might want to cook the oysters by placing them in a strainer and dropping the strainer into the broth to gently cook them (like I did). That way you can just top each bowl of gumbo with a few of the stewed oysters and you won't have to worry about an oyster going AWOL and turning up in your leftovers tasting bitter. This might mean that your leftovers are just "shrimp gumbo" leftovers and not "shrimp and oyster gumbo" leftovers, but, trust me, your leftovers will not be short on flavor.

Serves 10-12 people.

[adapted from The Lee Bros. Southern Cookbook]

Frankly, I was a little skeptical that that broth and that roux/vegetable combination would successfully become one, but they did. Of course, I simmered them considerably longer than the Lee Bros. did: 30-45 minutes versus 10 minutes. In the end, my Sunday-style Tuesday Night Gumbo took a good two hours to make, twice as long as the Lees' Tuesday-style Tuesday Night Gumbo, but every extra minute was worth it. That gumbo was full-bodied even before the seafood entered the picture. Five minutes later she was positively voluptuous, a true Cajun Queen.

If you've got your reservations about cooking oysters, just do what we did: buy some extra and serve yourself an oysters-on-the-half-shell appetizer while your gumbo is busy simmering. I mean, you're already buying oysters anyway, and if you look around you can find pretty good deals on small cases of oysters from Malpeque and elsewhere, so...

And while you're at it, you might as well buy some extra shrimp--let's say a quarter pound per person--and make yourself a proper shrimp boil for lunch. You're going to need some energy (and some patience) to make that gumbo properly, why not throw yourself a shrimp doubleheader?

boiled shrimp fig. b: earlier that day we luncheoned on spicy boiled shrimp

Simple Shrimp Boil

1/2 cup water
1/2 cup white vinegar
2 tbsp (+ a little extra) homemade shrimp boil [again, you can find directions here] or Old Bay seasoning
1 lb shrimp, in shells

Combine the first three ingredients in a saucepan and bring them to a boil. Add the shrimp, stir gently, and cover. Cook until tender, about 3-5 minutes, depending on the size of the shrimp. Drain the shrimp, reserving some of the broth for dunking. Sprinkle one teaspoon (or more, if you like them extra spicy) shrimp boil over the shrimp, toss, and serve with crusty bread and a salad for a light lunch.

Serves 2-4.

[recipe adapted slightly from the back of a McCormick Old Bay seasoning tin]

Now that's fast food. And who can deny spicy shrimp? We sure can't.

aj

* I'm definitely one of those "it just ain't a gumbo without a roux" types of people, but it's more than just the taste--it just isn't any fun to make a gumbo without making a roux, regardless of what night of the week it is.

Saturday, April 28, 2007

Shrimp, Shrimp Boil, Shrimp Burgers

boiled shrimp fig. a: freshly boiled shrimp

We might seem like a couple of Johnny-Come-Latelys with this post because those of you who keep abreast of the world of food magazines know full-well that shrimp have been nothing if not a hot topic over the last couple of months. They were the lead story in the March issue of Saveur, gracing the cover and providing the focus for a sweeping 15-page spread; they made the cover of the May issue of Food & Wine in the tantalizing form of "bacon-wrapped shrimp with passion fruit," the lead-in to a story on Jean-Georges Vongerichten's very own Polynesian Fantasy Island; and they played a prominent part in the bouillabaisse gracing the cover of the May issue of Gourmet. Hell, if that wasn't enough, we got a loaner copy of the January issue of Australian Gourmet Traveller because there was a feature on summer cocktails that one of Michelle's friends thought might be of interest, and, sure enough, there were "poached prawns" and "scampi with chilli and shallot salt," artfully placed next to a cool summer drink, right there on the cover. Everywhere we looked: shrimp, shrimp, and more shrimp.

Now, we're both big fans of shrimp--we don't know many people who aren't--so it wouldn't have taken much persuading to get us to try out some new shrimp recipes, especially because it's crevettes de Matane season around these-here parts--the one time of the year when shrimp are not only plentiful, they're tasty, regional, and relatively cheap. But what really got us all revved up and raring to go was the truly fantastic The Lee Bros. Southern Cookbook: Stories and Recipes for Southerners and Would-Be Southerners, which entered our lives recently when a certain someone picked it up for Yours Truly on the occasion of his birthday. The Lee Bros. Southern Cookbook is smart, charming, well-researched, and chock-full of all kinds tempting recipes for everything from cocktails, to snacks, to grits and rice recipes, to a stunning array of vegetable recipes ("Where did the South get its reputation for being hostile to vegetarians?," they ask). It's also got many of the poultry, pork, beef, and game you'd want from a book on Southern cuisine, from Baked Country Ham, to both Tuesday and Sunday Fried Chicken, to a "suite of pork picnic shoulder recipes" (Yes!). But for some reason we found ourselves particularly attracted to the seafood recipes right off the bat. In fact, when it came to giving our copy of The Lee Bros. Southern Cookbook a test drive we started with the very last recipe in the whole cotton-picking book, pg. 553's Lee Bros. Shrimp Boil. For those of you unfamiliar with Southern coastal cuisine and the range of spice mixes expressly intended for boiling seafood that are known as "boils" (of which McCormick's Old Bay is the most famous variant), the phrase "shrimp boil" might very well fill you with dread. It need not. As Matt and Ted Lee explaing, "A shrimp boil is a spice blend that combines with water to make an instantly spicy and aromatic broth, a perfect medium for boiling all sorts of fish and shellfish." We were curious to see what a homemade shrimp boil would be like, and we'd already determined that Lee Bros. Shrimp Boil was going to be crucial to upcoming Lee Bros. recipe testing, so we got to work. The fact that we had everything necessary onhand made things that much easier.

lee bros. shrimp boil fig. b: freshly prepared Lee Bros. Shrimp Boil

Lee Bros. Shrimp Boil

1 tbsp peppercorns
1 tbsp celery seeds
6 bay leaves, shredded with scissors
1/2 cup kosher salt
3 tbsp ground cayenne pepper

Pound the peppercorns, celery seeds, and bay leaf with the salt in a mortar, in batches if necessary. Place in a small bowl and stir in the cayenne. This mixture will keep for up to 2 months in an airtight container.

Makes 1 ridiculously fragrant scant cup.


With that out of the way we were all set for our first test. We were enticed by everything from the crab cakes, to the Bobo-Style Oyster Pie, to the Legareville Oyster Roast and the Rural Mission Crab Crack and Fish Fry, but what we settled on, what Michelle decided would make a particularly delicious lunch, was the recipe for Shrimp Burgers. I'd had my share of shrimp po'boys in East Texas and Louisiana, but I'd never been to any of the shrimping towns like Thunderbolt, GA, McClellanville, SC, or Morehead City, NC that the Lee Bros. single out as being prime stomping grounds for shrimp burgers. The Lee Bros. recipe was admittedly a bit new-fangled, utilizing the sweetness of corn to draw out the full flavor of the shrimp and ginger "to give it complexity," but we liked its apparent lightness of touch and its admonition to "use a gentle hand when flipping the burgers in the skillet," which was reminiscent of just the kind of crab cakes we prefer.

Shrimp Burgers

2 quarts water
2 tbsp Lee Bros. Shrimp Boil
1 pound headless large shrimp (26-30 per pound), shells on
2 tbsp chopped scallions
1/4 cup fresh corn kernels, cut from the cob (about 1/2 ear)
2 tbsp chopped fresh flat-leaf parsley
1 tbsp grated fresh ginger
1 1/2 tsp lemon zest (from 1 lemon)
3 tbsp high-quality store-bought mayonnaise, such as Hellmann's
1 cup bread crumbs, preferably fresh
kosher salt to taste
freshly ground black pepper to taste
pepper vinegar to taste (optional)
1 egg, beaten
1 1/2 tbsp canola oil

Bring the water and shrimp boil to a boil over high heat in a 3-quart saucepan. Turn off the heat. Add the shrimp and let stand until they are just pink, about 2-4 minutes, depending on just how big your shrimp are. Drain and run under cold water to stop the cooking. Peel the shrimp and chop coarsely [You can devein them first, if you like, but the Lee Bros. aren't fussy about such things unless the shrimp are being showcased in such a way that their aesthetics are critical, which isn't the case here.] You should have 1 3/4 cups chopped shrimp.

In a large bowl, mix the shrimp with the scallions, corn, parsley, ginger, and lemon zest. Stir in the mayonnaise and bread crumbs and season with salt, black pepper, and pepper vinegar. Add the egg and gently fold with a wooden spoon or rubber spatula until evenly distributed.

Form the shrimp mixture into four patties, each about 3 1/2 inches in diameter. Wrap the patties in plastic wrap and let stand in the refrigerator for 30 minutes [as in the case of crab cakes, this is an important step, so don't skip it].

Remove the burgers from the refrigerator and unwrap them. Place the oil in a 12-inch skillet and heat over medium-high to high heat. When the oil shimmers, add the burgers and sauté until both sides are gently browned, about 3 minutes per side. Drain on a dinner plate lined with a paper towel.

Serve on a toasted hamburger bun (or a fresh Portuguese bun) with lettuce, tomato, and Tartar Sauce (such as Lee Bros. or A.J.'s E-Z Spicy).

Serves 4.

Pepper Vinegar

1 cup white wine vinegar
2 Thai, serrano, or bird's eye chiles, fresh or dried

With a funnel, pour the vinegar into a cruet. Add the chiles and use a chopstick or the handle of a wooden spoon to submerge them, if necessary. Cap the cruet and place it in the refrigerator. The vinegar will be well infused in 24 hours and will keep for months in the refrigerator.

A.J.'s E-Z Spicy Tartar Sauce

4 tbsp high-quality store-bought mayonnaise, like Hellmann's
8 salt-packed capers, rinsed and minced
1 tsp chipotle puree

Mix all ingredients in a small bowl. Makes enough for four shrimp burgers.


shrimp burgers fig. c: freshly made shrimp burger

How'd they turn out? Just great--look at that baby. Really one of the best lunches we've had in recent memory and an auspicious debut for The Lee Bros. Southern Cookbook.

aj

Monday, August 21, 2006

BBQ #1.2: Throw Your Own!

super ape mini

Mile End/St. Louis BBQ #1’s* North Carolina-style pulled pork BBQ was small by comparison. We got the word out kind of late and essentially we wound up catering to a small coterie of friends, with just a few new faces thrown in for good measure. That was our first experiment with taking it to the streets, though, so we were happy to keep things tidy. This time around, we got a little more adventurous. We made a lot more food, teamed up with our friends at Backroom Records and Pastries, and spread the word a little more widely. People started arriving before we’d even finished setting up. And within ten minutes of opening up for business roving bands of jerk BBQ/vinyl/pastry enthusiasts started to make their way up the alley to pay us a visit. 90 minutes later, we’d been cleaned right out. What a rush! Michelle and I barely got a chance to sample our own wares—we had two jerk pork sandwiches, two ginger beers, and two, count ‘em, two shrimp between us. Hell, we were so busy I never even got a chance to pull out my camera to document the event. We couldn’t have been happier though. When the dust had settled, we’d fed somewhere in the neighborhood of 60 people, and in spite of some shortages late in the game, most appeared to have left satisfied. Meanwhile Backroom Records was doing booming business and Backroom Pastries had moved every last slice of Rum Cake and Coconut Cake.

Want to throw your own jerk pork BBQ event? Want to experience the high that comes from making heavily Scotch bonnet-laced Jamaican jerk in your very own kitchen? Want to open your own jerk joint? Well, here’s everything you need to know…

One thing you’ll notice as you peruse the recipes below is that that Jamaican holy foursome of Scotch bonnet peppers, fresh thyme, scallions, and allspice shows up repeatedly. Don’t let this dissuade you. You’ll find that each dish has its own distinct personality.

Jerk Pork BBQ

Michelle and I were both big fans of Jamaican jerk BBQ to begin with, but there’s no question that we were hugely inspired by Melissa’s truly breathtaking account of her culinary adventures in Jamaica, and specifically by the wonderful post she devoted to the subject of Jamaican jerk. Those of you who know us here at “…an endless banquet” know we’ve been big fans of The Traveler’s Lunchbox for quite some time, but her series of posts that resulted from her recent trip to Jamaica might very well be our all-time favorites. She built up slowly to a crescendo, making her way through tantalizing accounts of Jamaican breakfasts, rum tastings, and garlic lobsters--when she finally got around to discussing the search for perfect jerk, a topic clearly dear to her heart, we were nearly beside ourselves.

We used a slightly modified version of Melissa’s Jamaican Jerk Pork recipe, a recipe which she had adapted herself from Lucinda Quinn’s Lucinda’s Authentic Jamaican Kitchen, and which she claimed came closest to capturing the majesty of a jerk joint like Scotchies. The major difference was that we cooked the pork in the oven longer and at a lower temperature, just as we’d done when we made our North Carolina-style BBQ (to refresh your memory with regards to this Basic Pulled Pork Barbecue method, looky here). We did this partly because we needed to roast then grill our meat and then have it ready to go by 11:30-11:45, and partly because we were so darn pleased with the results of our first pork BBQ event. So, once again, we wrapped our pork shoulders (this time boneless) in foil, making sure we’d given them tight seals, placed them in a water bath in our roasting pan, and cooked them slow and low overnight. And once again, I’m sure the aroma of that jerk paste-marinated pork drove our neighbors crazy all night long. We also made two batches, one with one Scotch bonnet pepper, for the faint of heart, and one with four to appeal to our hard-core contingent. Melissa recommends that the amateur stick to the 1-6 Scotch bonnet range, but points out that in Jamaica, “the sky’s the limit.” It might just have been the particular Scotch bonnets that we got, but, in retrospect, I wish I’d made batch #1 with 3 and batch #2 with 6. When the two batches had slow cooked for 8+ hours, we unwrapped the pork shoulders and finished them on our hickory-smoked grill (unfortunately, pimento wood is a little hard to come by here in the Great White North) for about 15-20 minutes, making sure they got blackened just so on the outside, while remaining juicy and tender on the inside.

Jamaican Hot Pepper Shrimp

We found this recipe in Gourmet’s May 2005 Street Food Issue. The idea of buying hot and spicy shrimp by the bag beachside instantly won us over. Imagine.

We followed this recipe closely, multiplying everything by a factor of three because we had 3 lbs of shrimp, but we balked when it came to adding 9 fresh Scotch bonnet peppers. I wish we hadn't. Our shrimp were nice and spicy, but not wild, the way we would have liked.

4 cups water
1/2 cup chopped scallions
4 garlic cloves, crushed
3 fresh thyme sprigs
3 fresh Scotch bonnet peppers, halved and seeded
2 tbsp salt
1/2 tsp freshly ground black pepper
10 whole allspice
1 lb large shrimp

Combine all the ingredients except the shrimp in a heavy pot and bring to a boil, then reduce the heat and simmer, covered, for 20 minutes. Stir in the shrimp, making sure they’re just covered by the liquid, and remove the pot from the heat. Cool shrimp in the liquid to room temperature, uncovered, about 1 hour. Transfer the shrimp with a slotted spoon to a plate or bowl and drizzle some of the cooking liquid on top, or serve them 6 or 12 to a bag the way we did.


Jamaican-style “Rice and Peas” with Red Beans

This recipe came from Madhur Jaffrey’s World Vegetarian cookbook, a book that still gets a lot of use in our household even if we have drifted from vegetarianism over the years (we’re hosting pork BBQ events now, for Christ’s sake). You’ll notice that here the Scotch bonnet pepper is used whole. This way it only imparts a subtle citric flavor to the dish. Be careful not to puncture the pepper or the dish will become exponentially hotter.

1 1/2 cups dried red beans
2 cups canned coconut milk, well-stirred
1 Scotch bonnet pepper, whole
6 tbsp finely sliced scallions or 4 tbsp finely chopped chives
3 to 4 fresh thyme sprigs
2 garlic cloves
1 small onion
3/4 tsp ground allspice
1 1/2 – 2 tsp salt, or to taste
freshly ground black pepper

Soak the beans overnight or use the quick-soak method. Drain, discarding your soaking liquid.

In a large pot, bring the beans and 4 cups of water to a boil. Cover, turn the heat down to low, and simmer gently for 1 hour, or until the beans have turned just tender. Add the coconut milk, the Scotch bonnet pepper, the scallions or chives, thyme, garlic, onion, and allspice. Stir and simmer for 30 minutes. Add the salt and pepper, stir, and simmer another 30 minutes, or until the beans are tender. Taste and make sure the seasonings are well-balanced. Remove the Scotch bonnet pepper and the thyme sprigs before serving. Serve over freshly cooked white rice, or stir into a pot of 3 cups of freshly cooked basmati rice like we did, using the cooking liquid as needed to give the “Rice and Peas” just the moistness you desire.


Super Ape-Approved Ginger Beer

This recipe came from one of Saveur's summer special issues. We loved the way the vanilla bean helped to smooth out an otherwise potent brew (deliciously so, I might add). The mint leaves are a great finishing touch, too.

3/4 lb fresh ginger, peeled and grated using the large-hole side of a box grater
2 tbsp fresh lime juice
1/4 tsp ground mace
1 1/2 cups light brown sugar
1/2 vanilla bean, split lengthwise
Half a bunch of fresh mint

Put the ginger, lime juice, mace, and 1/2 cup of the sugar into a widemouthed gallon glass or a ceramic jar. Scrape the seeds from the vanilla bean into the jar and add the pod as well. Add 12 cups boiling water to the jar and stir until the sugar dissolves. Set ginger mixture aside to let steep and cool to room temperature. Cover jar tightly and refrigerate for 1 week.

When the ginger mixture has brewed for one week, line a sieve with a double layer of cheesecloth. Strain the ginger mixture through the sieve into another widemouthed gallon glass or ceramic jar, firmly pressing on the solids with the back of a spoon to extract every last bit of flavor. Discard the solids. Add the remaining sugar to the ginger beer and stir until it dissolves. Serve in glasses over crushed ice, garnished with mint sprigs. If you want to stretch out the ginger beer or dilute it a bit and add some effervescence, mix with club soda first.


The moral of these stories: don't hold back. Have faith in the almighty Scotch bonnet pepper (or in the power of ginger, for that matter) and go for broke.

aj

* Since we keep getting asked, the name is a nod to the legendary Lexington BBQ #1 in Lexington, NC. The Mile End/St. Louis prefix has nothing to do with St. Louis, MO, it’s the name of the district we live in.